09 February 2024

Brand New Dutch AFV Cards

 In honour of completing my first Dutch unit, I contacted Greg in the UK who originally did the BAOR, West German and Soviet cards to see if I could get non-pdf copies of those cards, so I could create some more for the other nations covered in the game - starting of course with the Dutch.

Unfortunately he has lost all the files with the old cards, but was able to steer me in the right direction with another template - which I was able to use to generate this new set of cards - the first in what I hope will be a whole series of new cards to cover all the nations that don't currently have them.

I may even redo the original cards, as I have found some info missing - and I've made a few updates since Greg so kindly did them for me.

Anyway - here is the link to the new Dutch cards:

Dutch AFV Data Cards

You can also find them in the "Data Cards" Tab at the top of the page.

Any feedback or errors found and pointed out, will be greatly appreciated.  I'm about half way through the Belgians and will probably do Norwegians after them.  Any votes to do another nation first won't be summarily ignored!

Thanks and I hope you find these useful

Richard

30 January 2024

Dutch 103rd Reconnaissance Battalion

Hello 2024 - a year I've decided that I will attempt to have a focus, and that focus will be Americans!  I have 3 US WW2 armies that need to be completed (and started!) and various USAEUR forces and a USMC force for the Cold War that need to be completed.

At the same time, I'm also trying to complete some Cold War Recce units for my (completely in my head at the moment) new Cold War game.

So what better way to start 2024, than with a Dutch force!  It all makes perfect sense to me!

So this is both a new project and more importantly, a completed project.  It's a full strength a platoon from the Dutch 103rd Reconnaissance Battalion based at Seedorf in West Germany circa 1985.  I think it has a great mix of vehicles - including a couple (the standard M113 and the M106) that you don't really find much in the Royal Dutch Army.

Here's all the vehicles that make up the unit.

Image
The unit consists of the Platoon Commander in his M113 C&V command and reconnaissance vehicle, armed with a 25mm autocannon (centre front), a reconnaissance group (centre back), a tank group (obvious), a rifle group (in the M113) and a mortar group (in the M109).

Here's a close-up of the Commander in his M113 C&V

Image

The reconnaissance group is made up of 4 x M113 C&V split into 2 teams, each with 2 M113 C&V.
Image

Here's some close-ups of the various M113 C&V's that make up the two reconnaissance teams. Team leaders are shown in the the turret hatch.
Image
Image
Image
Image

All the M113 C&Vs are 3D prints. The Platoon Commanders vehicle has been further modified by drilling out the drivers hatch and making a new open hatch. The commanders are all AB figures and the driver of the Platoon Commander's vehicle is an Airfix figure from their Dakota Skytrain kit, with a green-stuff dodgy headset added.

The tank group is made up of 2 Leopard 2NL

Image
Image
Image
Image

Both Leopards are old Matchbox models, and I've added 3D printed Dutch style smoke launchers and wire reel, plus Elhiem FN MAGs which they used rather than the German MG-3s. The Tank Commander is an Elhiem figure.

The rifle group is mounted in a standard M113

Image
Image
Image
Image
Again the M113 is a 3D print, the M113 commander is an Elhiem NATO driving figure, while all the infantry are also Elhiem NATO figures


The mortar group is mounted in a standard M106

Image
Image
The M106 is a 3D print and the mortar crew are again Elhiem figures

So that's my first completed non-American project for 2024.

Thanks for looking and have a great New Year!

Richard

27 November 2023

Norwegian Home Guard

 Very quick post today as I'm trying to get ready for another Cold War game (well 2 more actually) but I just finished this figure and had to post it up straight away.

This all started when I asked what I thought was a simple theoretical question to Matthew Hingley of Elhiem Miniature fame.  I wondered how hard it would be to change a weapon on a figure stl file.  The figure I was thinking of was one of his WW2 German Gebirgjager figures, which he has already converted into stl files.  What I was thinking of was converting one to look something like this:

Rather than simply answer the question, Matt had a crack at it and then sent me the file!

Unfortunately I've recently been having serious, head banging against the wall kind of issues with my 3d printer.  But last week I finally managed to get a print of this figure off it, so I had to paint it straight away.

Here's how it turned out:


OK - my basing is pretty crap, but I just love the figure.  Now I have to work out how to convert at least a squad more!  At least the MG34 gunner is already taken care of, and the MP40 armed NCO is also easily done (as in they already exist in the Gebirgsjager range), I just need the rest of the AG3 armed Home Guard.

Another problem for another day...

Thanks

Richard

11 November 2023

Matchbox M24 Chaffee & Matador Models NM116 Conversion Set Review

Jumping to the next random topic - today I want to take a look at the Matchbox M24 Chaffee and the Matador Models NM116 Conversion Set.

I managed to get a hold of 2 of the Matador Models NM116 conversion sets 3 or 4 years ago, but only snagged a couple of Matchbox M24 Chaffee a couple of years back - so of course it wasn't until this year that I was able to have a crack at these.  Then once I started I was so put off by the whole thing that it probably took me all year to finish the two kits.

First off I love the NM116.  It's the epitome of a teeny weeny tank trying to take on the Soviet war machine - my kind of against all odds weapon system.  Here's a few pics of what it's meant to look like:

Here's a lovely side shot.  Some great stowage ideas as well that I will be stealing!

This is a more widely seen photo of the NM116.  A good view of the muzzle brake.

Not really an "in action" - more of a static display shot - but it does show in some detail the interesting Norwegian hard-edge cam pattern used on their vehicles.  Something I'm looking forward (ha!) to replicating. 

Now onto the models.  These are obviously not painted, and not even a "finished" build.  However I thought this was a good point to stop to show the original Matchbox Chaffee, the Matador Models conversion bits, and my dodgy add-ons.  Here's a couple of photos:


So looking at the 2 photos above, obviously the grey and green tanks are all Matchbox.  The 90mm new main gun barrel, raised engine decks, smoke dischargers and spades (which you can't see) are Matador Models. The white plastic card on the track guards cover the hole created when I cut of the large boxes that come with the Chaffee kit.  I also had to remove the sand guards (?) from these as I've not seen an NM116 photo showing a tank with these.  I added a couple of boxes from my PSC bits box on each side of the track guard - as also seen in lots of photos.

Significantly I also had to add, from plastic card, rod etc, the Simrad LV3 laser rangefinder and what I believe is the passive night vision sight for the gunner.  Before I can call it finished - in terms of converting - I also need to add a small rod in front of the commander's hatch which was an additional attachment for the turret roof mounted .50 cal.

This shot shows the Matador Models engine deck a little better:

You need to clean off any detail on the models engine deck before you can fit these.  I also need to severely trim one of them to get the turret to fit correctly.

This next photo was an attempt to get a closer shot of detail on the turret & main gun:

So I'm happy with the smoke dischargers - which are really pretty basic, but the main gun barrel is a little disappointing and I think the muzzle brake is completely wrong.  They were also very annoying to try and bend the resin barrel back into straight lines and I feel I was only partly successful.  Also I felt a bit let down that I had to make the laser range finder - something I consider to be fairly fundamental in changing the tank from the Chaffee to the NM116.

You do get a bunch of other bits and pieces - mainly WW2 stowage - from Matador Models, but these are really just to spice up the M24 Chaffee - they're not really for the NM116 - and I didn't use them at all.  I did use a big bit of stowage I made on the grey tanks glacis plate.

Final thing to say.  Even though I am a little disappointed overall with the conversion set, I am pretty happy with the overall look of the NM116.  Needless to say, I'll be liberally coving both tanks in cam netting and foliage so they'll end up more like the next photo anyway - so you won't be able to see much of the tank at all!


What tank?

So - that's it for now

Richard


07 November 2023

New Project - The HMMWV Horde

 So time for another new project.  This one has been brewing for years but now I'm in a position to actually transition from the plan to reality.  I mean who wouldn't want to field a horde of dinky little HMMWV's up against a swarm of much more heavily armed huge Soviet tanks and other AFVs! 

First up, I needed some kind of plan.  Luckily you get a lot of info in FM 17-98, FM 17-95 and FM 17-97 - which provide some great information on the use of HMMWVs in Cavalry and Scouting operations.  It also led me to be able to draw up this basic plan of what was needed: 

Obviously I won't be getting everything on this TO&E plan - as each Scout Platoon would have operated independent of the other one, and the HQ and Maintenance Sections wouldn't have wanted to spend that much time up in the enemy's face - I think...

So - I decided one Scout Platoon would be the core component of my force.  So 5 of these:
and 5 of these
I'd attach one Antitank Platoon with 4 or these:
And also have the Mortar Platoon available - they use something like this:

The FIST also needs to be available.

I want to add some other HMMWV mounted units to make the force more interesting.  Firstly I think the unit needs some Air Defence, so an Avenger is necessary
I'd also like to have a small squad of engineers attached and I think they would look good if I could make their ride look like this:
As I have the model I'd also like to have an Ambulance:

Finally - I think an imaginary WW3 is the perfect opportunity to introduce some weapons systems that never made it into production, but that have a certain coolness factor and would certainly fit into this unit for a little fire support.  So I need to add a couple of these:
This of course also opens the door - and takes care of some of the vehicles for another project - a Motorised Infantry Company from the 9th  Infantry Division (Motorized) - the High Technology demonstration division for the US Army in the 1980s.  So at least a couple more odd HMMWVs are required for that as well, plus loads of other goodness.

As part of this project I'm also working on a very small army list for a Light Cav Company for my old unofficial Battlegroup: Cold War variant and I'm also hoping to use this force as a starting point for my own unique game.

Hopefully I'll have some progress on all fronts to show off in the next little while.

Thanks all

Richard


26 October 2023

The Grumble Hunt - Part 2 - The Game

Well it took a little longer than I expected to be able to finally write up how the game went.  As an added bonus though, I can now also let you know what happened when I ran this at NATCON last weekend.  Both games feel like a long time ago though...

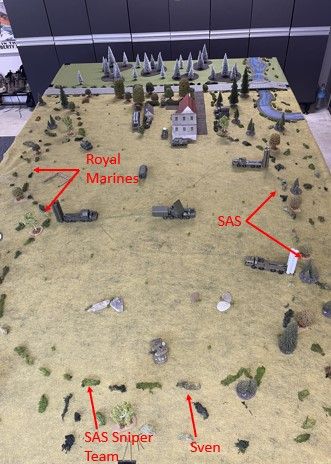
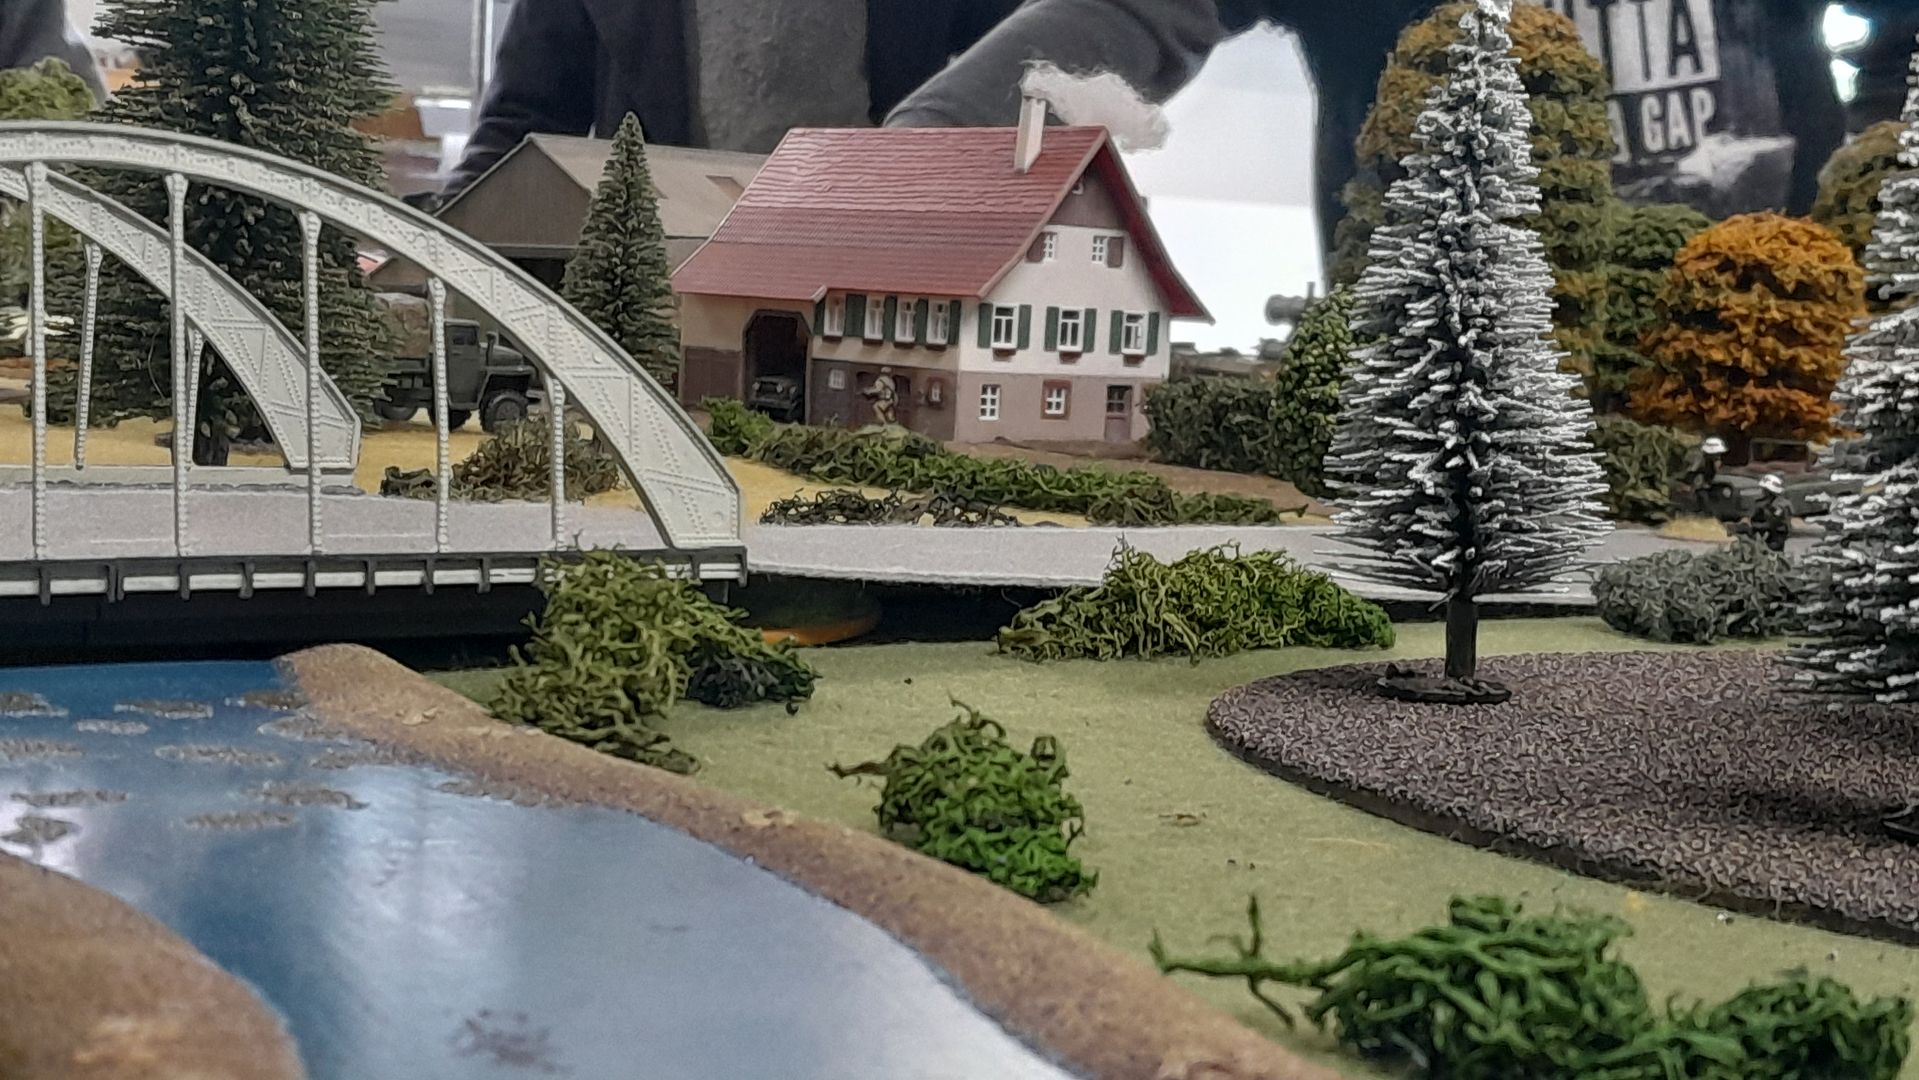
Anyway - the players could set up anywhere on the board, at least 6" back from any Soviet troops or vehicles.  This was their approximate set-up.

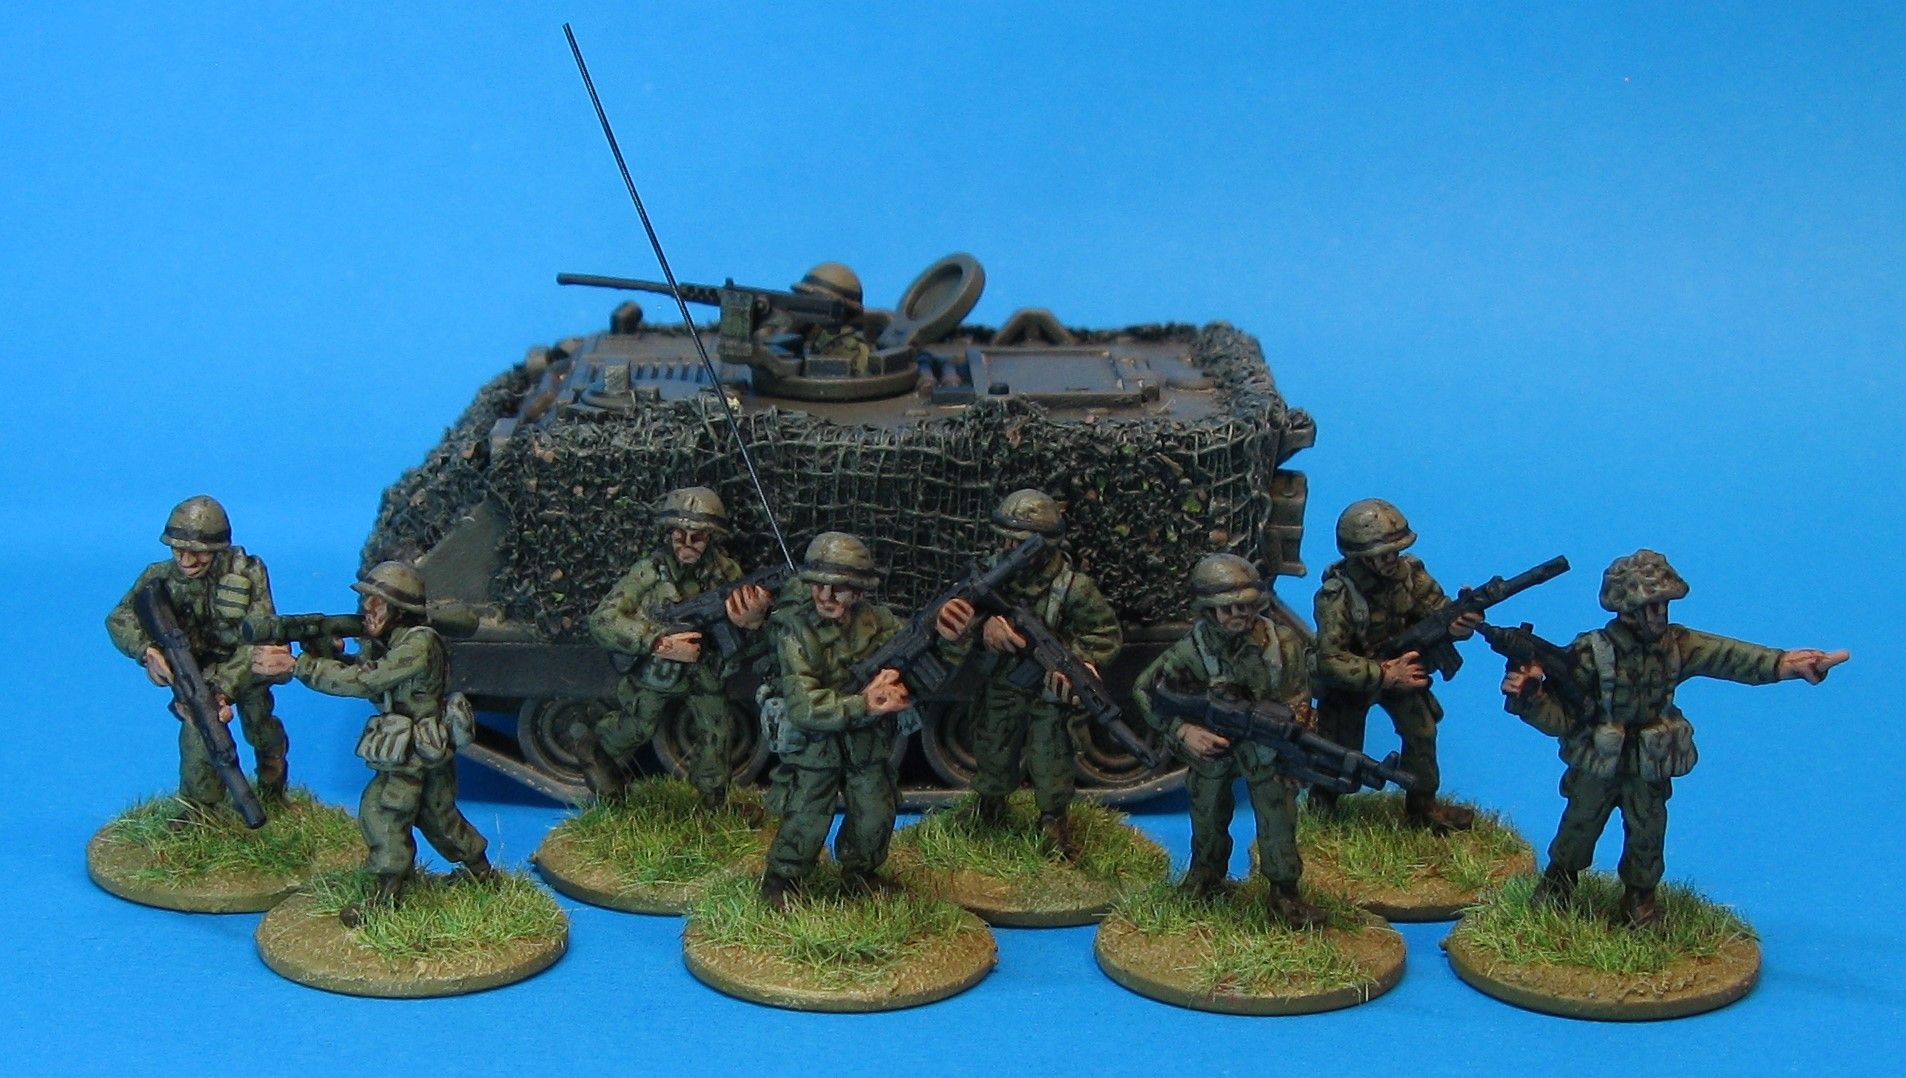
As you can see they kept to their original teams and weapons load-outs.  They generally started just over 4" from the paddock edge, well hidden in the scrubland.  They players waited about 3 or 4 turns waiting for the patrolling sentries to get to just the right point.

Here's a few shots of the sentries and motor rifle patrols and MPs
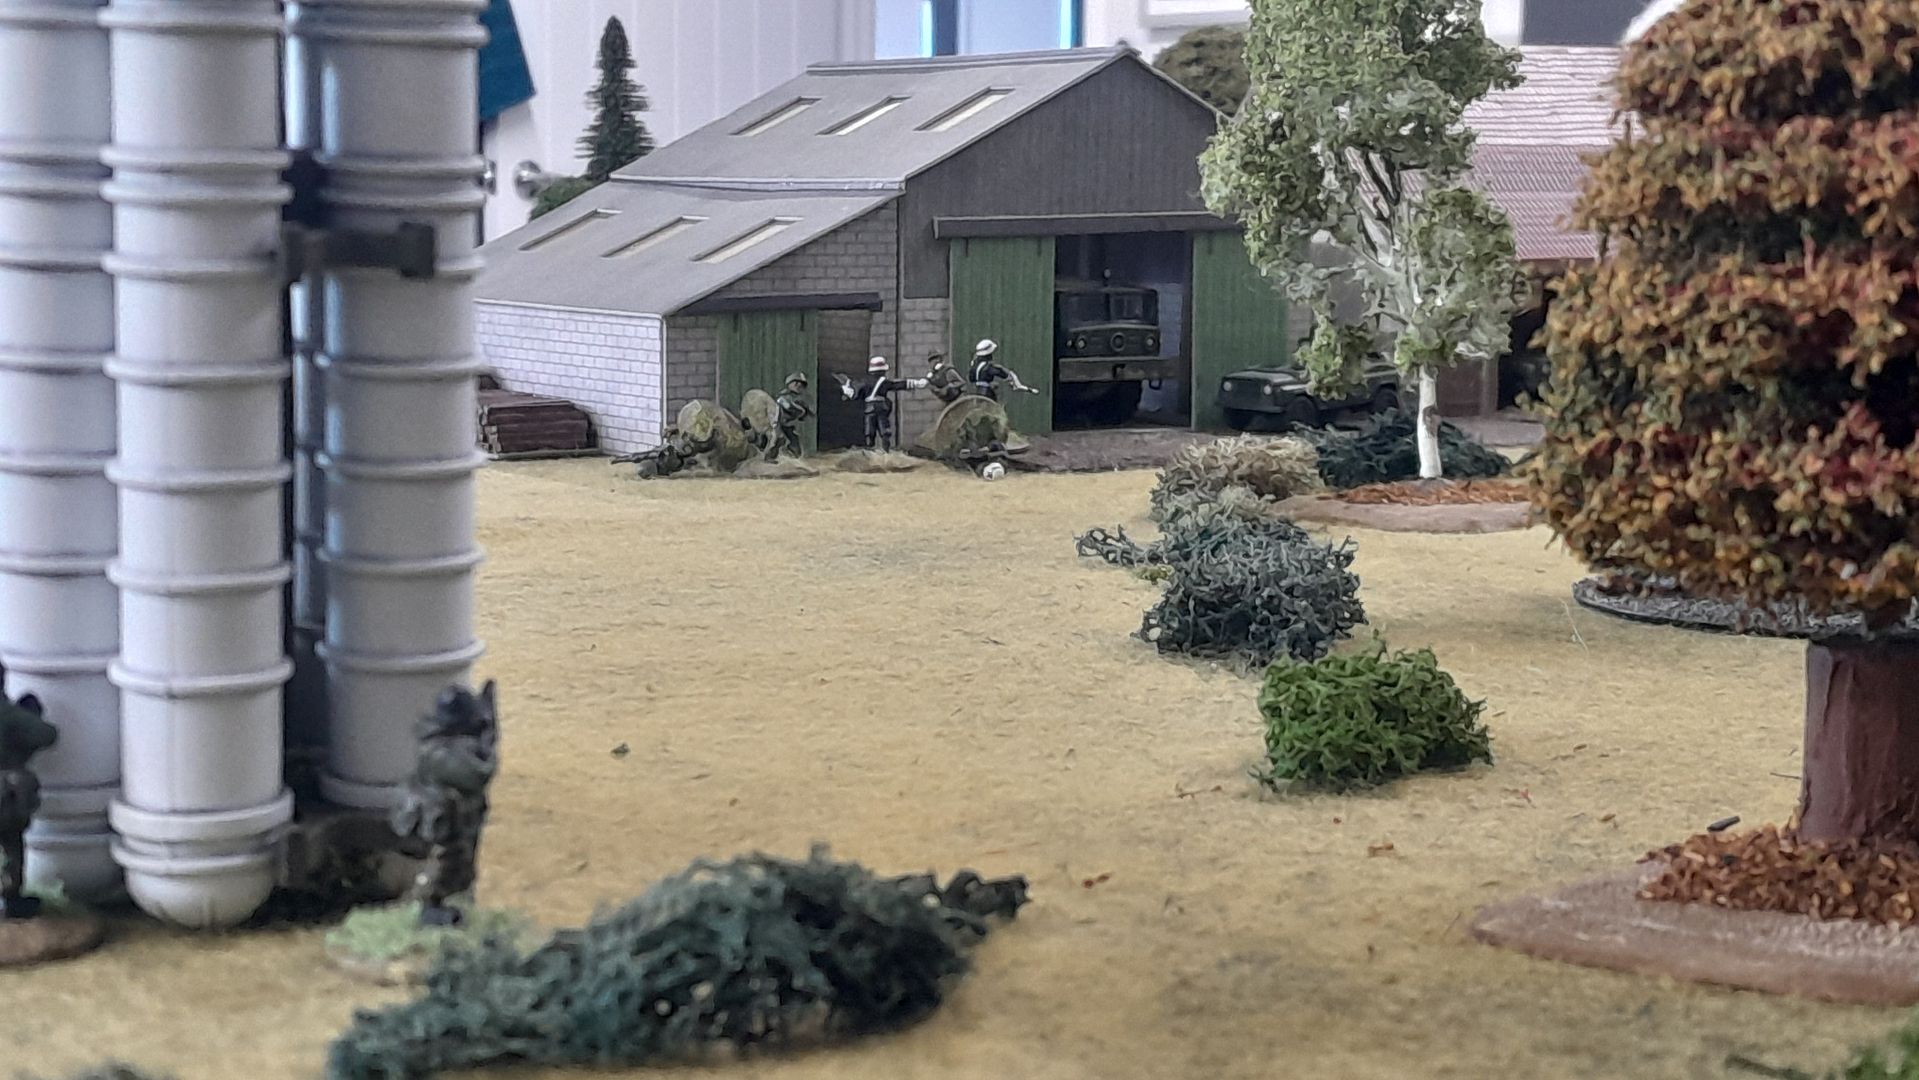
This shot mainly shows the MP "road block".
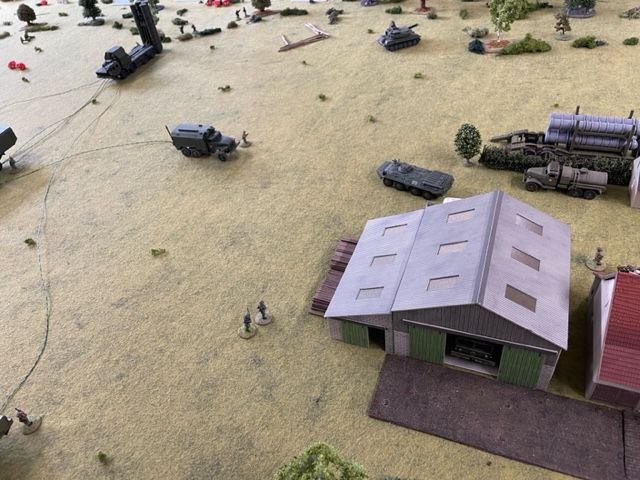
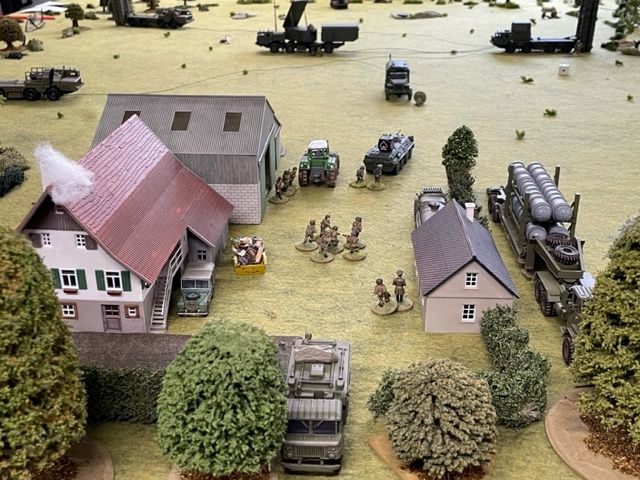
An overhead shot showing various sentries and patrolling motor rifle troops.  You can see here how difficult it is to take out a sentry or patrol without someone else seeing what just happened.
More of the same
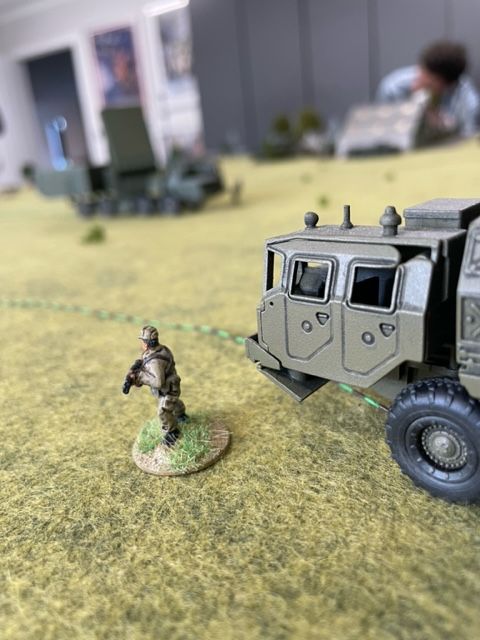
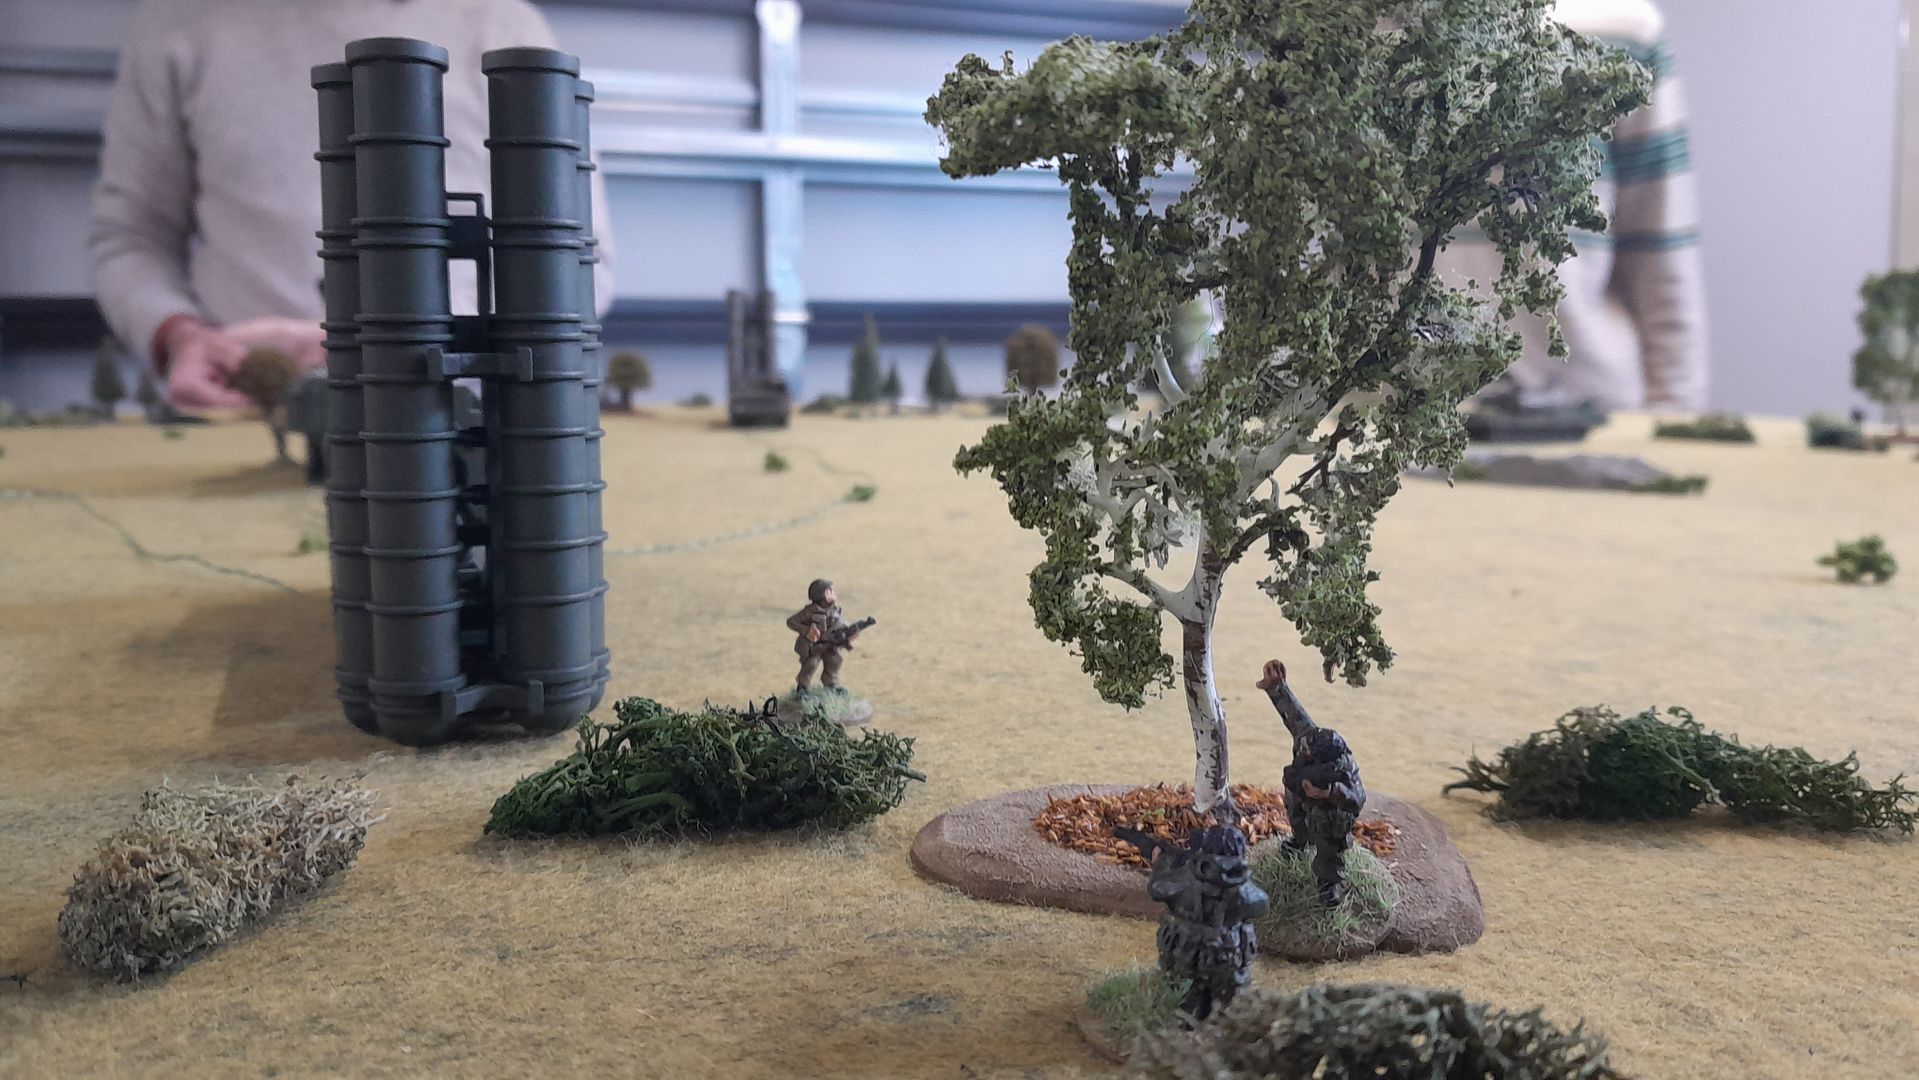
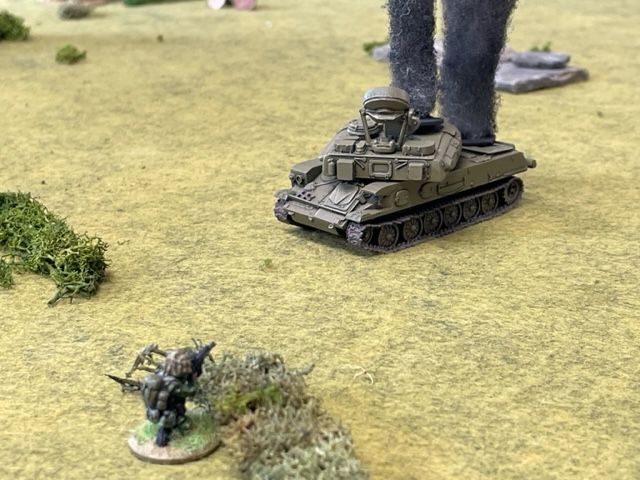
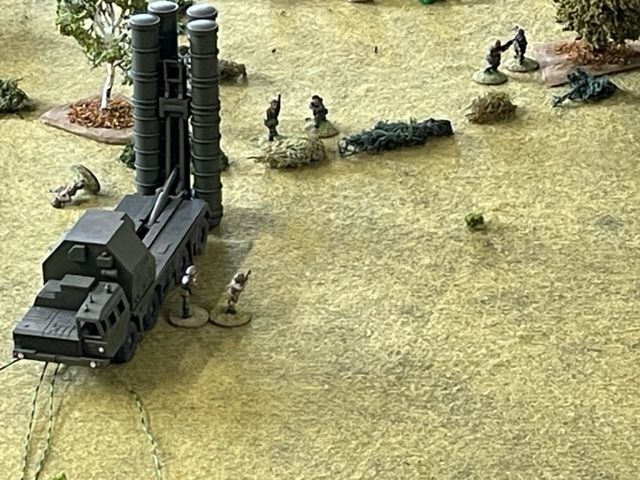
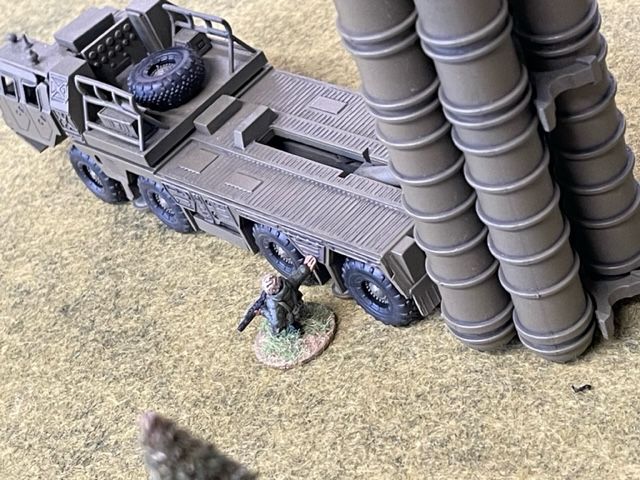
Close up of one of the SAM technicians who drew the lucky straw to guard a TEL this evening/morning.
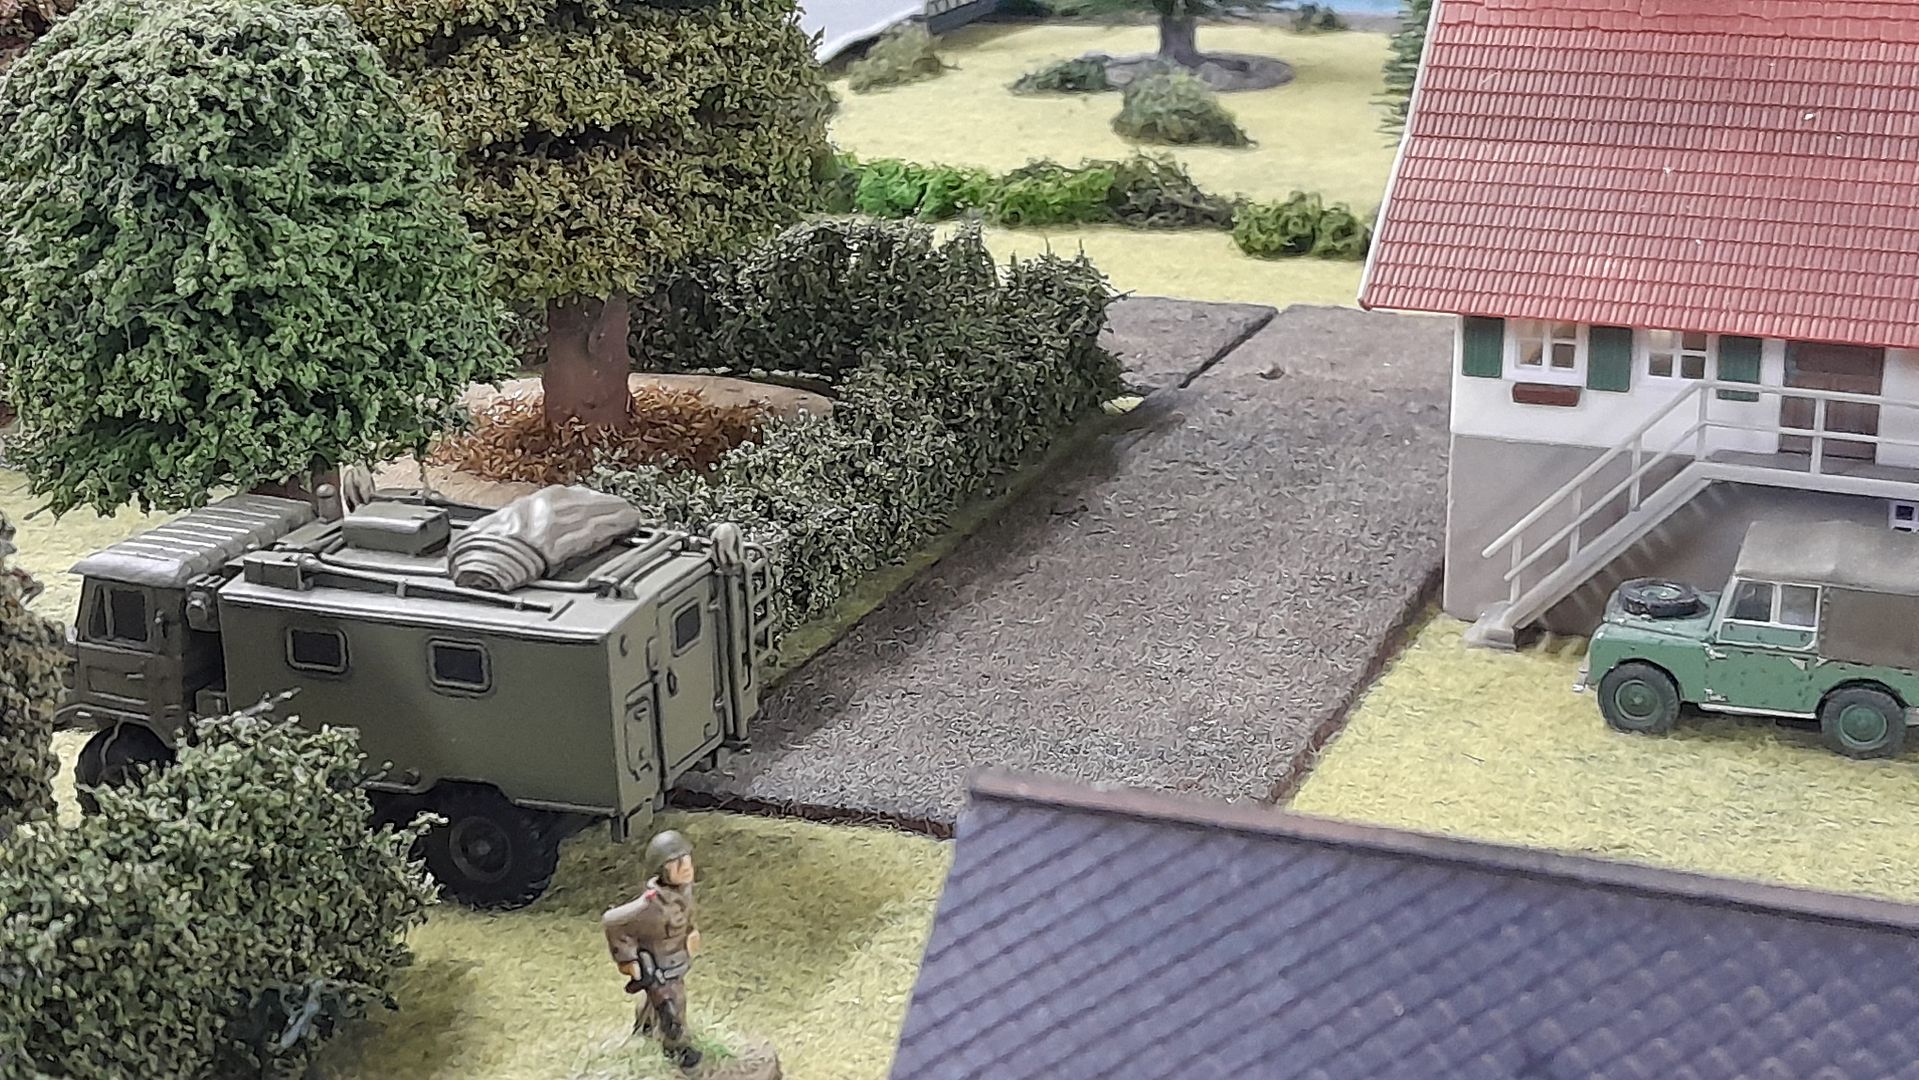
A lone sentry near the site survey vehicle and back door to the main house.
A long range shot of the sentry at the front of the house and the MP unit on the E6 highway.
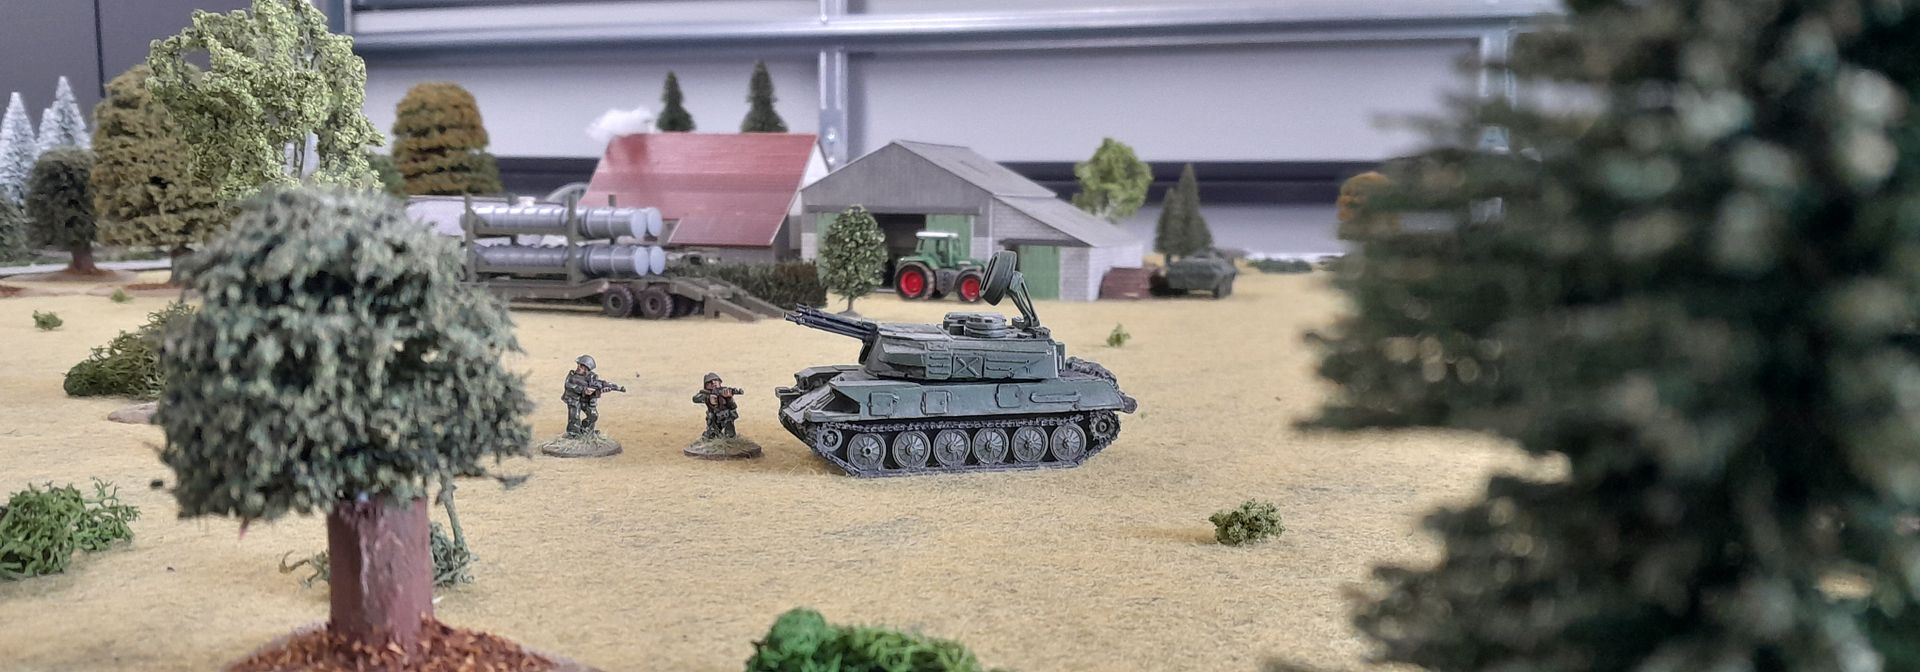
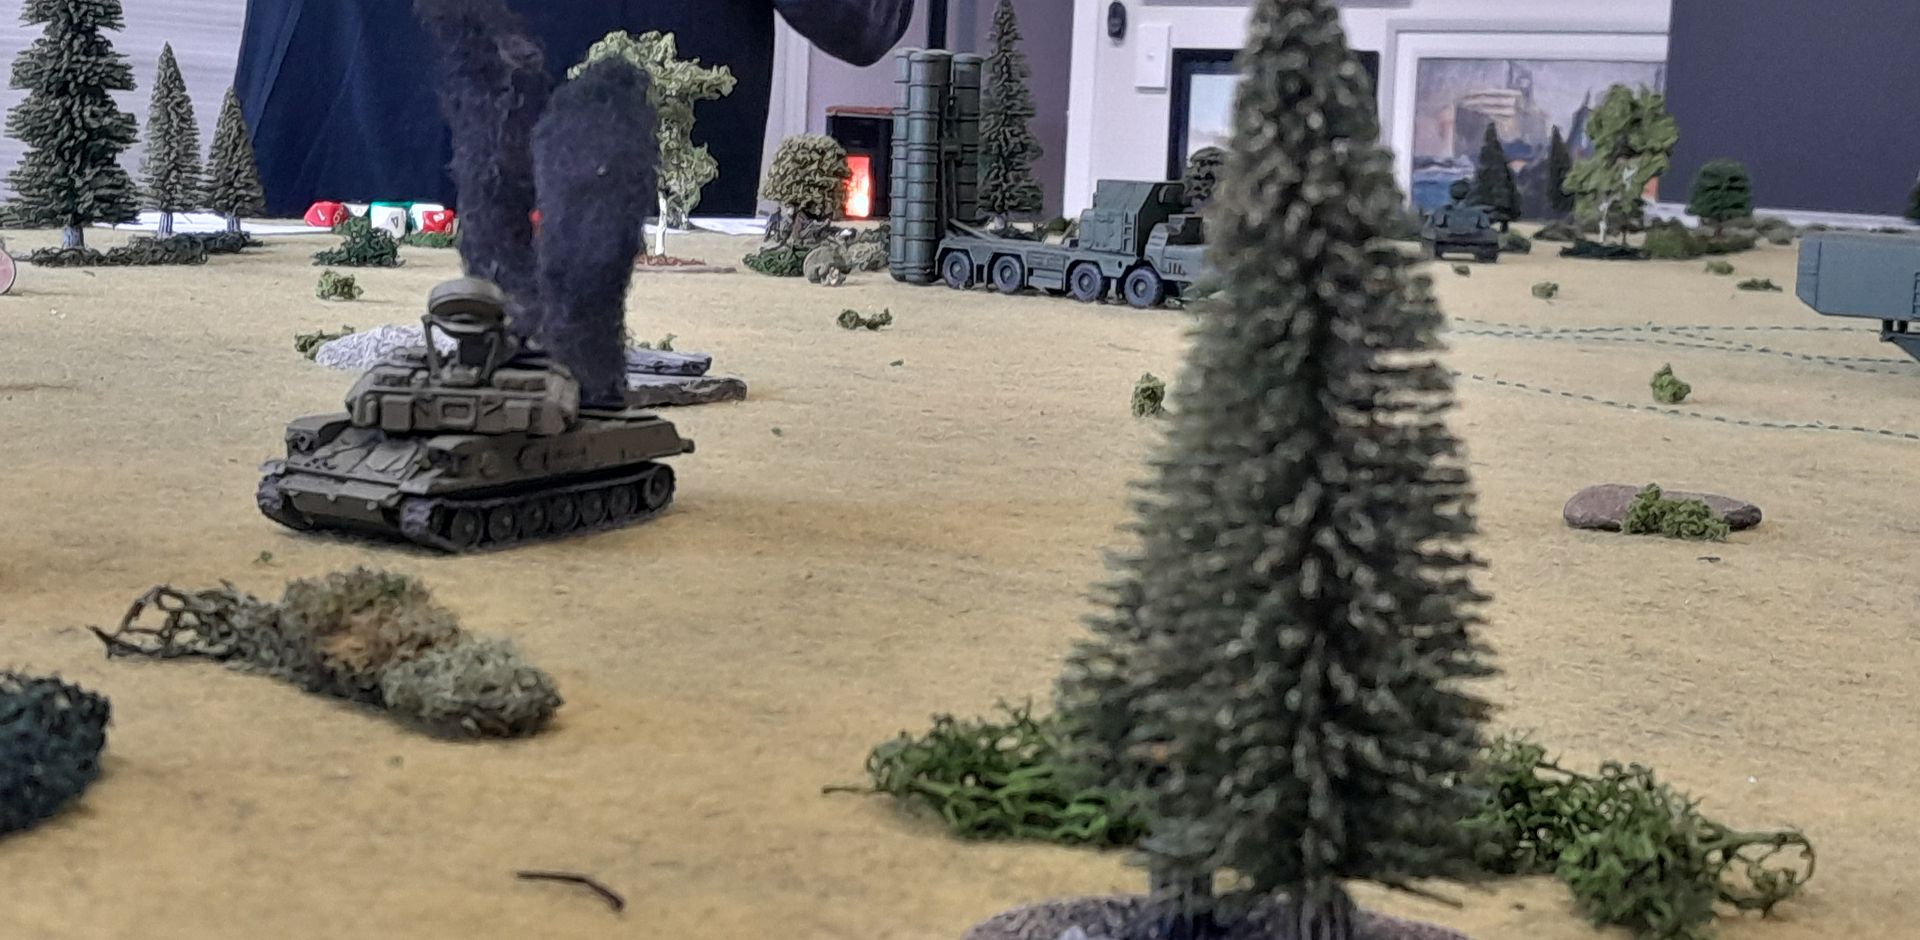
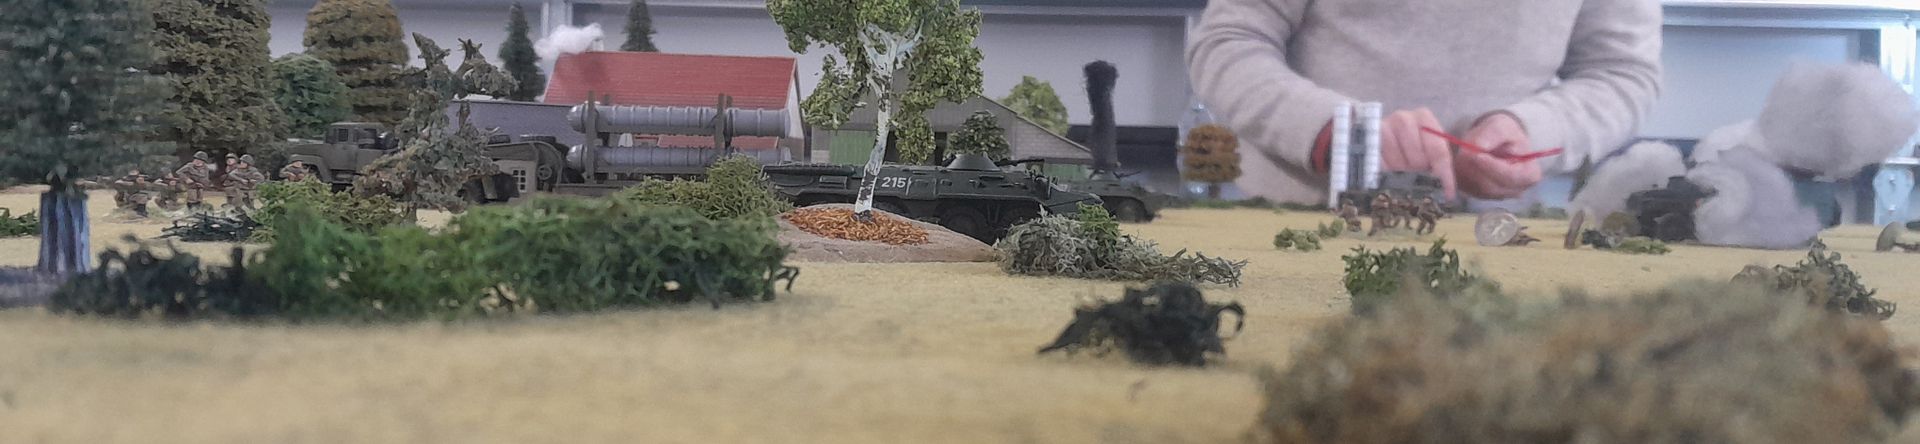
2 Motor Rifle troops on patrol near a ZSU-23-4.  These chaps would provide the first real headache for the Special Forces.
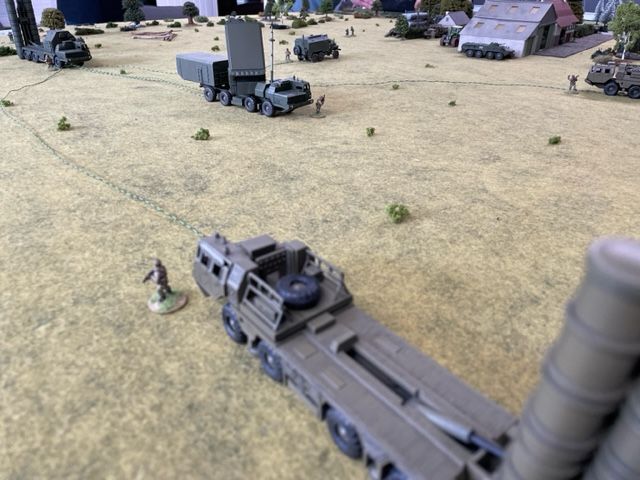
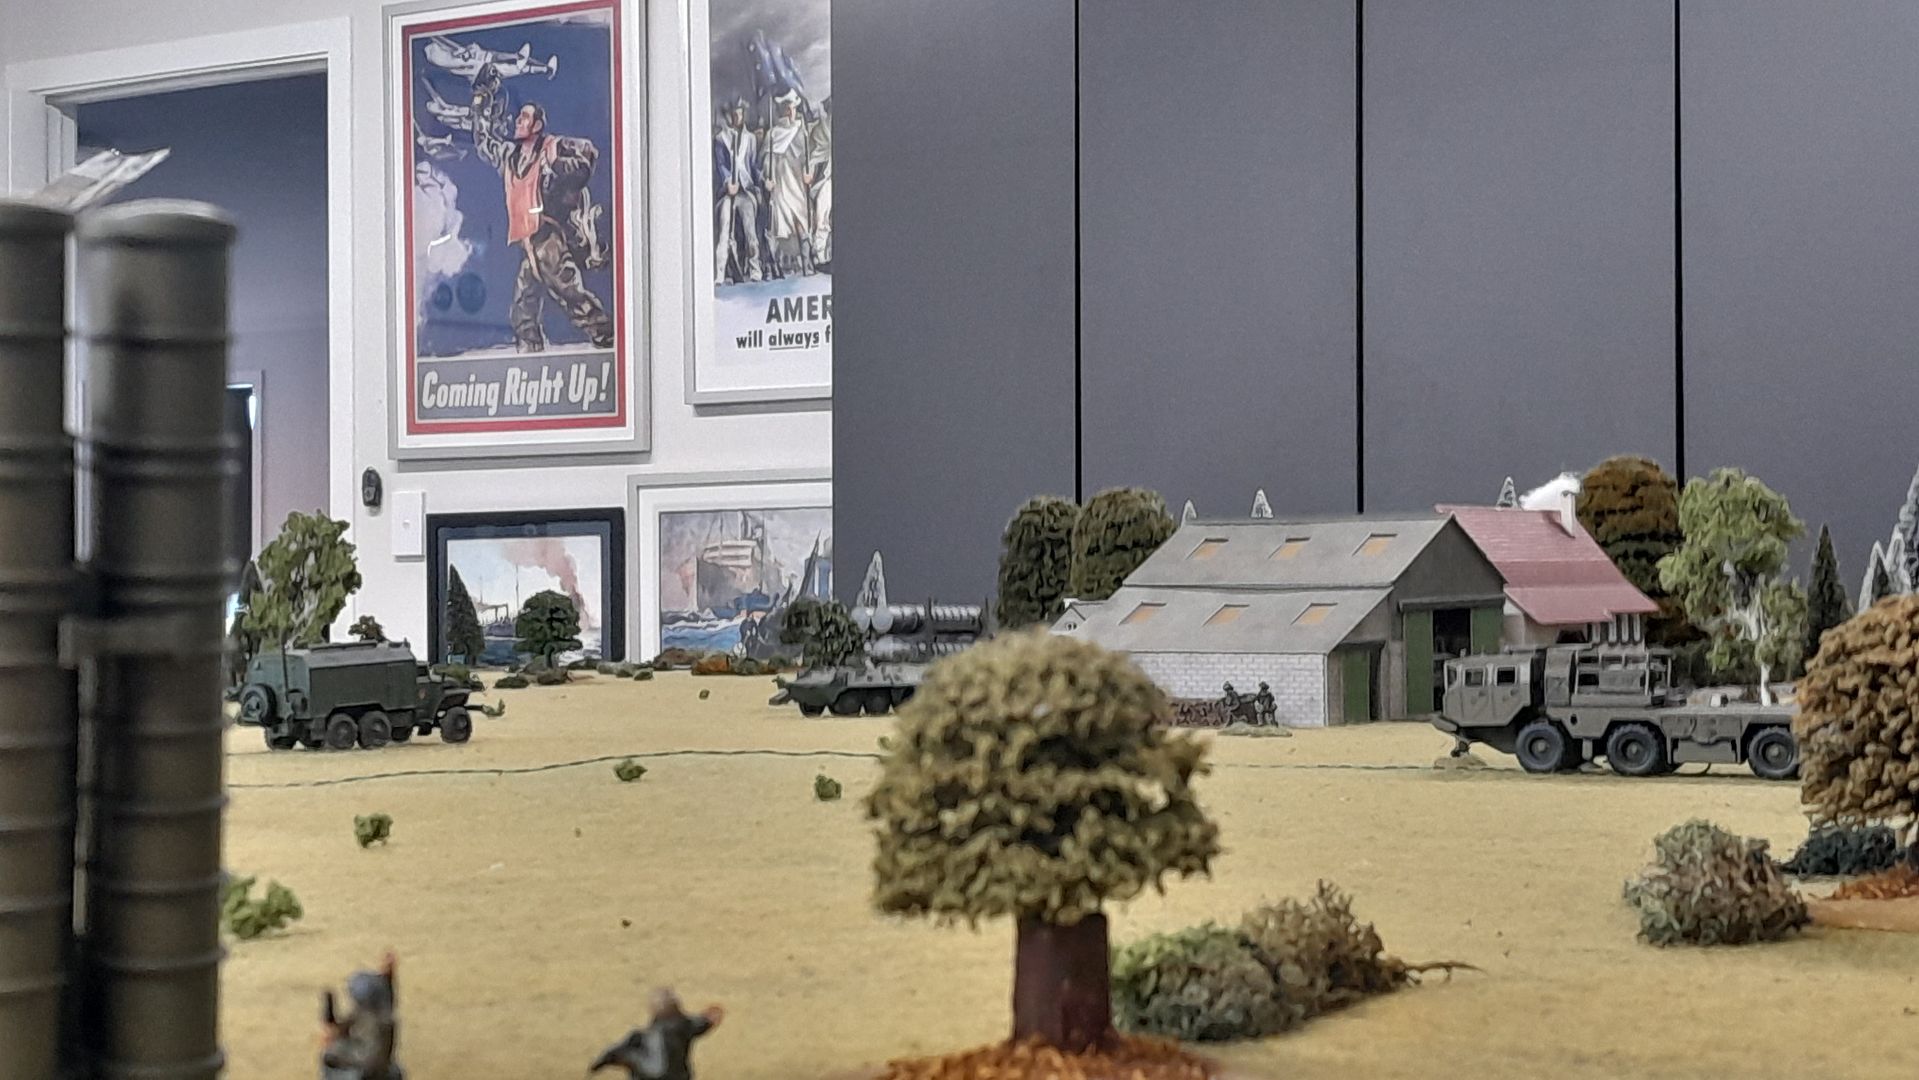
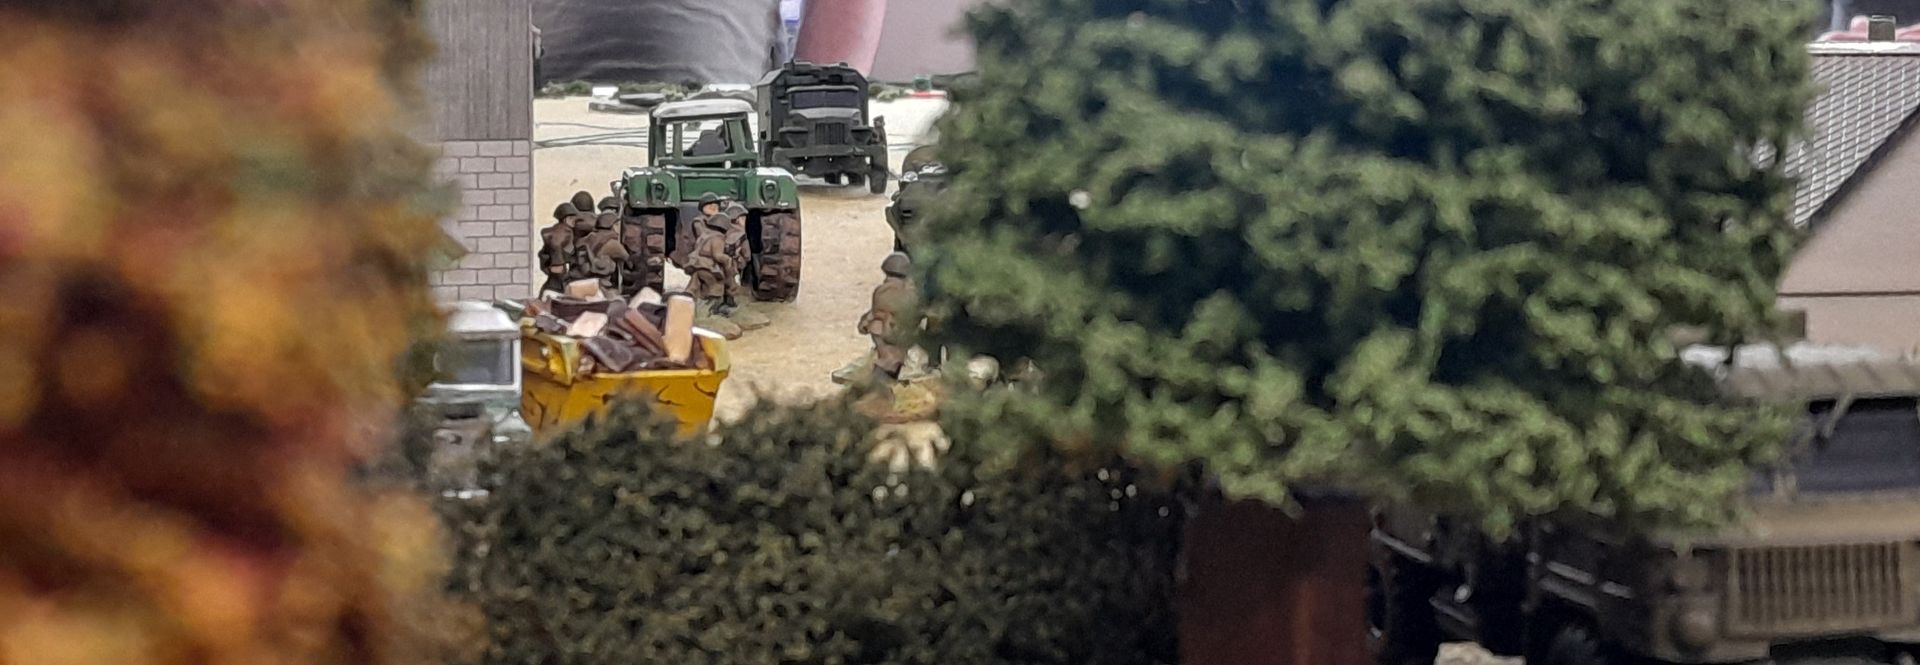
Another long range shot, with SAS chaps lurking in the foreground while off in the distance near the barn you can see 2 Motor Rifle troops and you can just see a sentry near one of the dumb TELs.
Final "Sentry Shot" is of a sentry, just before he gets shot!

It all kicked off on the Royal Marine M&AWC side of the paddock, when "Tazzer" attempted to silently take out the 2 Motor Rifle troops (Yuri & Ivan obviously) walking towards him from the ZSU-23-4 pictured above.  Despite complete surprise with his MP5SD, he only managed to take down Yuri, so Ivan immediately fired back - in the general direction of the scrubland, as he couldn't really see where the shots had come from.  The alarm was raised on the first real turn of the SF attempting to do anything.  Not a great start...

Tazzer's squad went into action and started laying down fire, taking down Ivan and killing the sentry who had been guarding the Smart TEL.  As other sentries and patrolling Motor Rifle troops started to react, "Stinky" the sniper also began to fire.  He took down 2 more patrolling troops without breaking a sweat.  Silent but deadly!

Sven grabbed a grenade and started to stalk towards the northernmost ZSU-23-4.  It kicked into life and it's turret started to swing towards where all the shooting was taking place. 
You can see the sentry and motor rifle patrol taken out in the distance

Discretion proved the better part of valour, and Sven stepped back into the scrubland, waiting for a better moment.  "Baz" however, decided it was time to intervene, and picking up his one 66, fired the rocket into the side of the ZSU - knocking it out spectacularly.

Stinky and Baz looking on at what they have just done.
Sven - "I could've done that if they gave me a rocket!"

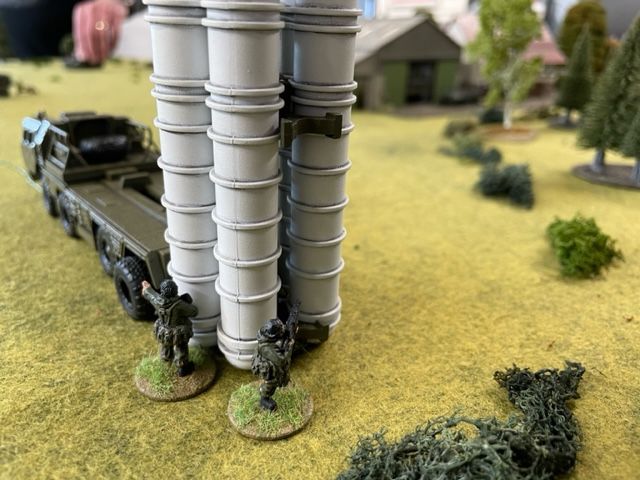
Meanwhile on the SAS side of the table, the lads carefully and quietly went about their business of taking out the sentries near their dumb TEL targets and began to lay charges on them.  It was quite helpful for every Soviet in the vicinity to be looking at the other side of the field where all hell had broken loose.
Nothing to see here.  Move along...
Me?  Just checking your tyres to make sure you've got no flats!

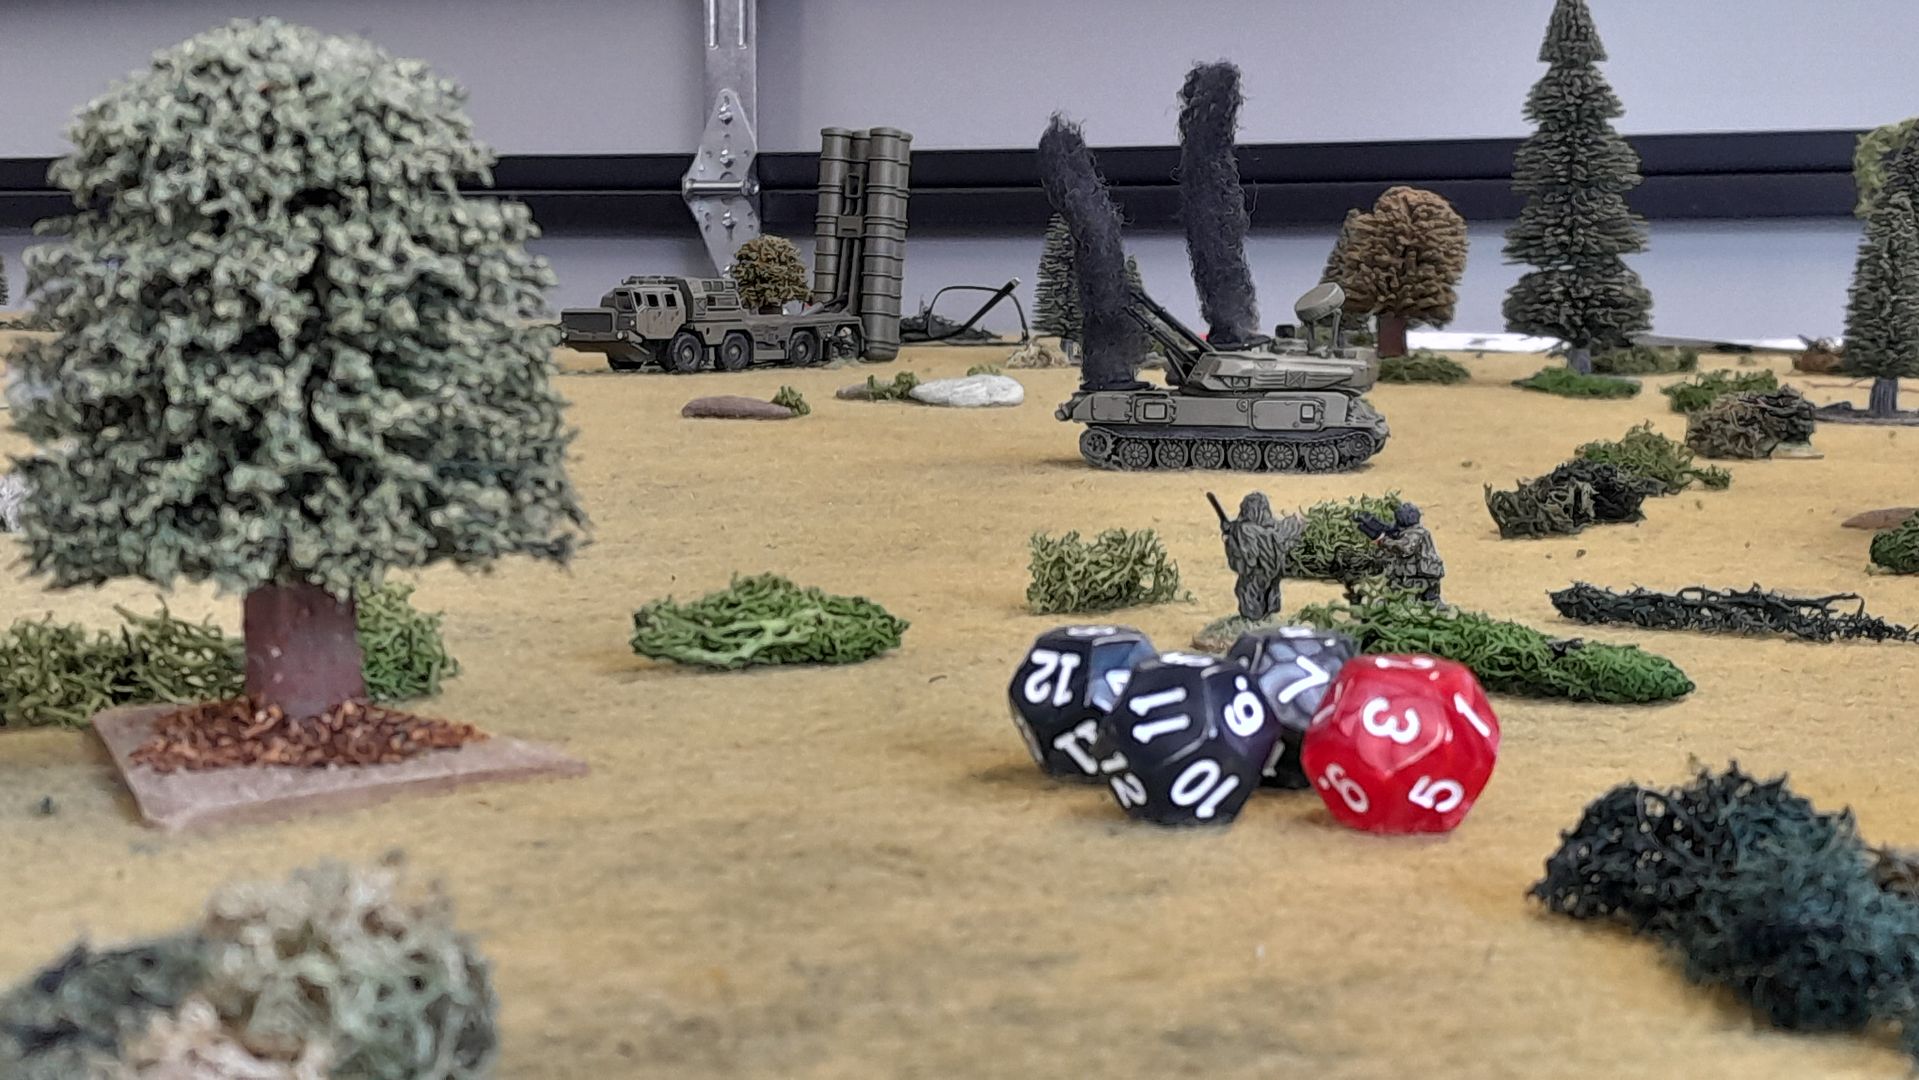
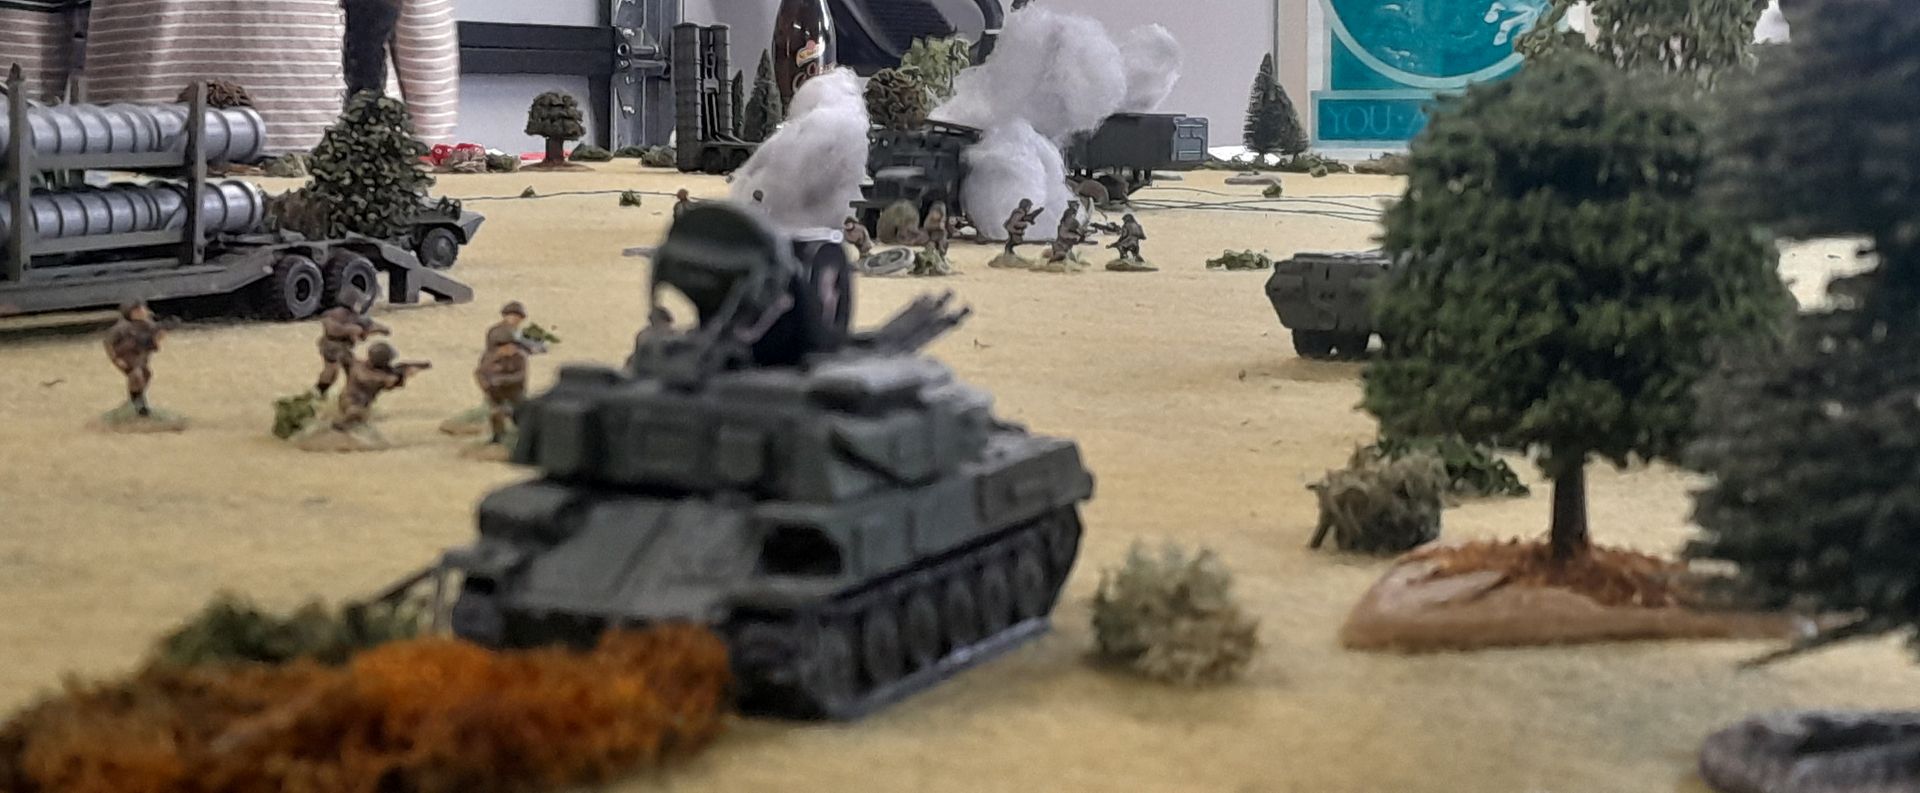
Trying to emulate the sniper team's success the Marines fired a LAW at the other ZSU-23-4.  Another hit, but after the explosion they could see they had not knocked it out, but its 4 23mm cannons were all pointing in odd directions.  It was basically out of the game too!
We marked it with a special dice to show it's main guns were out of action.

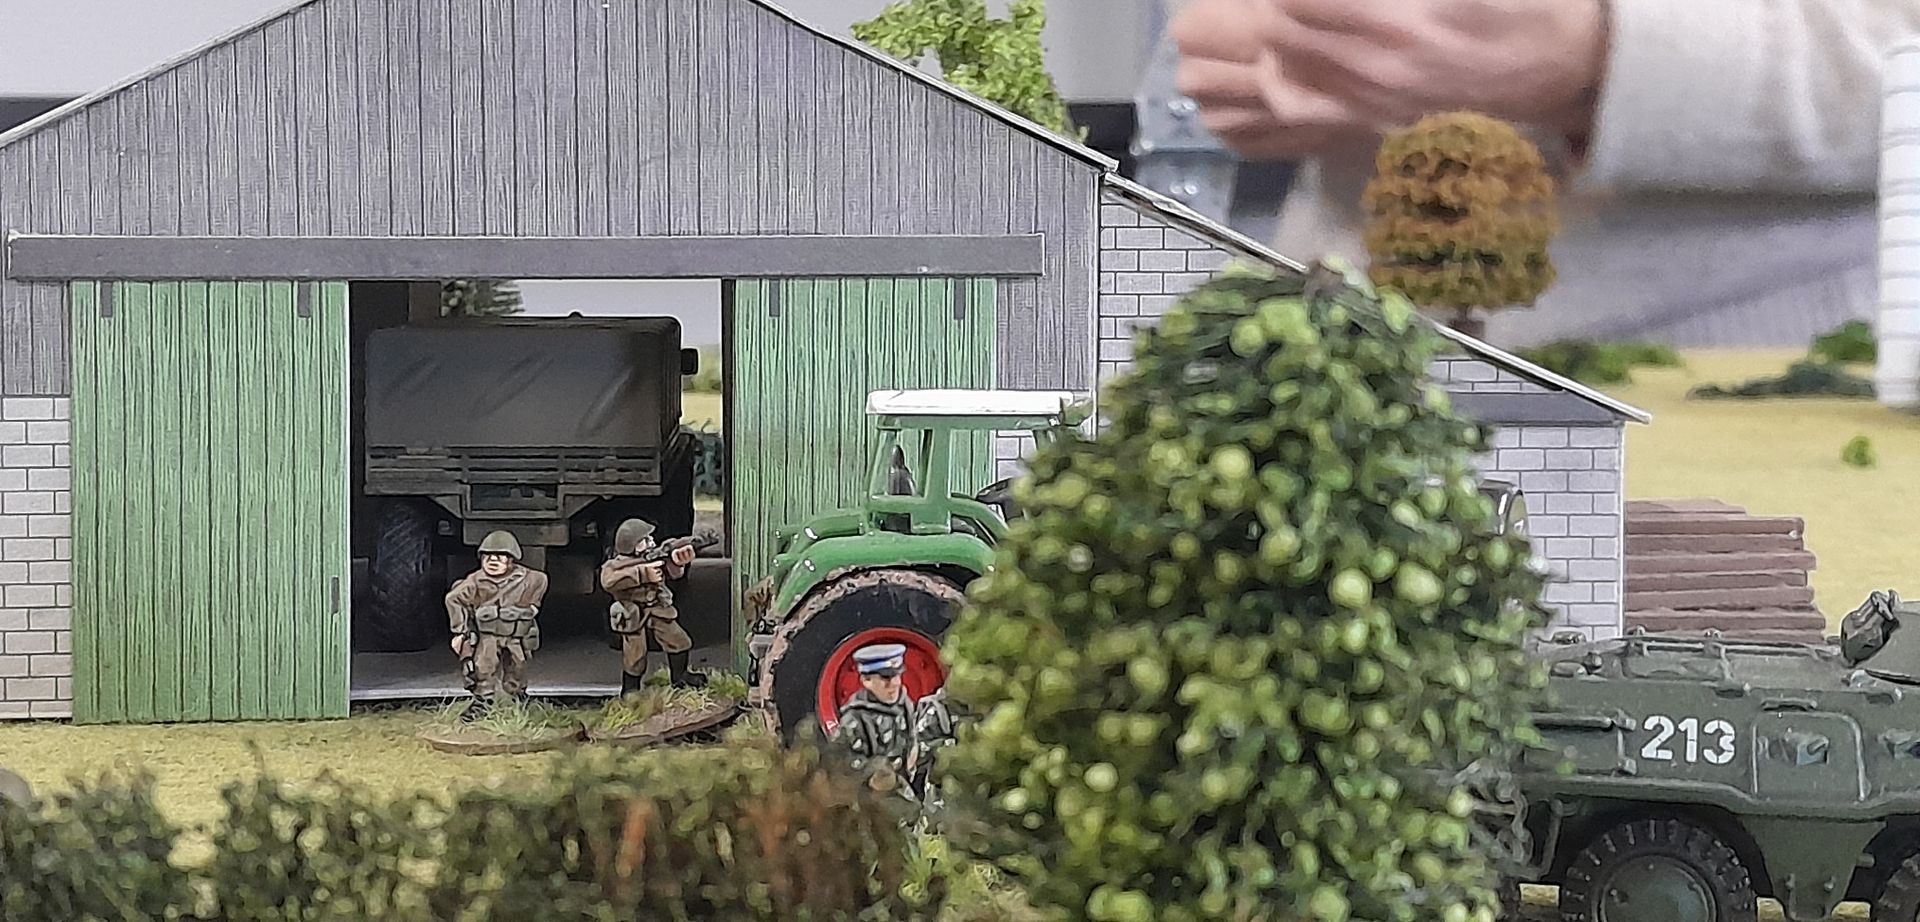
By now the Soviets who had been in the houses working or resting, started to react and those at their duty stations in the vehicles started to pile out to fight off the intruders.  
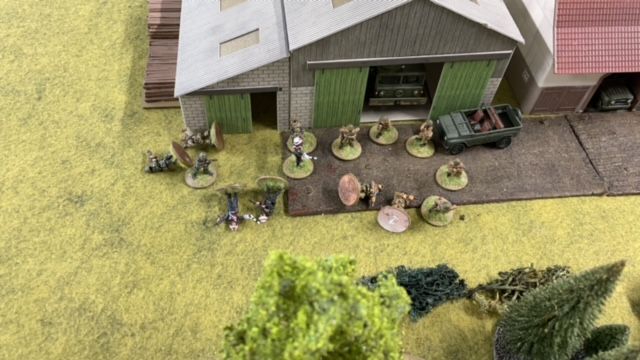
A couple of grunts leave the barn, with the Battery Commander in the front, trying to see what is going on!

Jumping out of their vehicles didn't always go down so well...

Nor did forming into small isolated teams to take on the Special Forces...
Here some Soviets stumble across the SAS team.  Guess who this ended badly for!

The  BTR-70 crew started up their AFV and manoeuvred to enter the fight.  This earnt them a LAW in the turret which also knocked out their main gun.  The MP's jumped into their UAZ-469, leaving their radio man to contact the QRF and headed into action.
The MPs managed to spot the SAS near the first dumb TEL, but the SAS were quicker to react and "Boss" started popping grenade rounds into them, taking out several.

More Soviets started to hear towards the gunfire
and more
and more

The gunfight between "Boss" and the MPs plus more and more Soviet techs and drivers continues with Sven joining in from long range.  


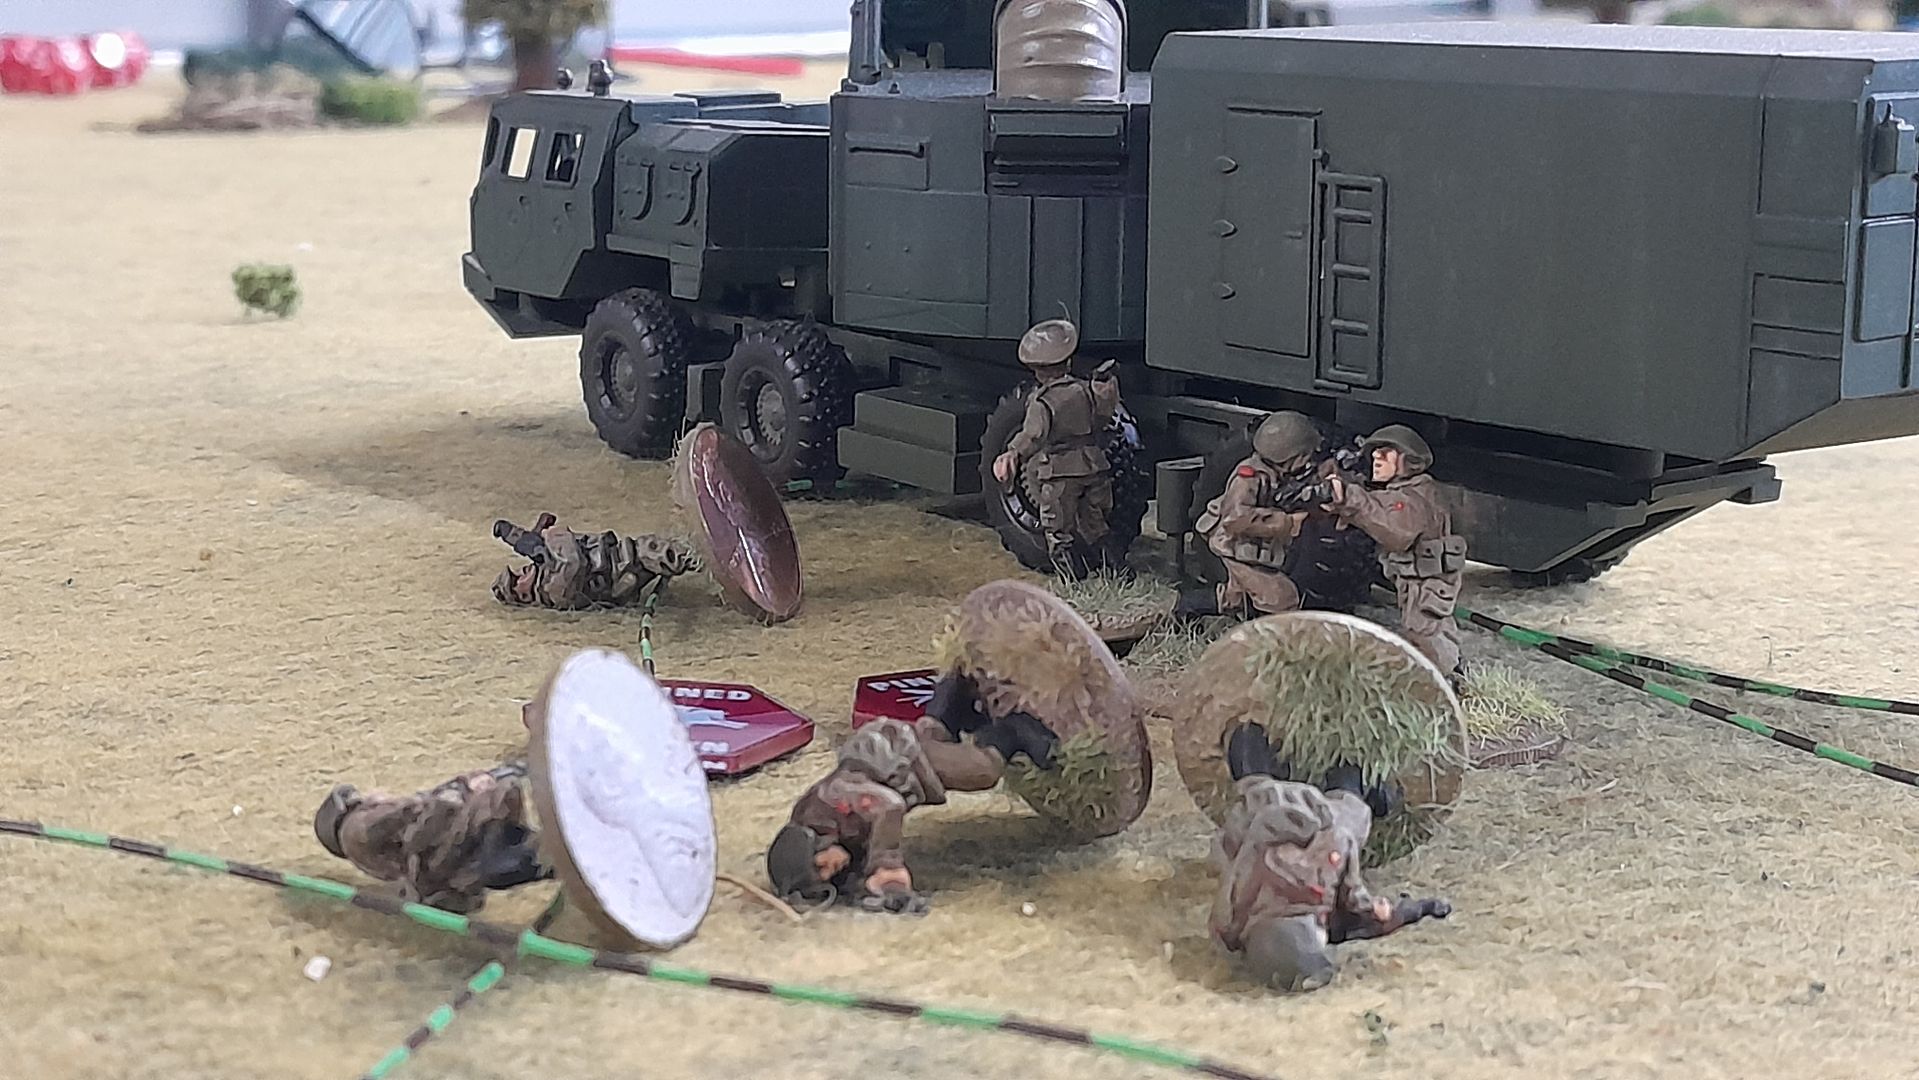
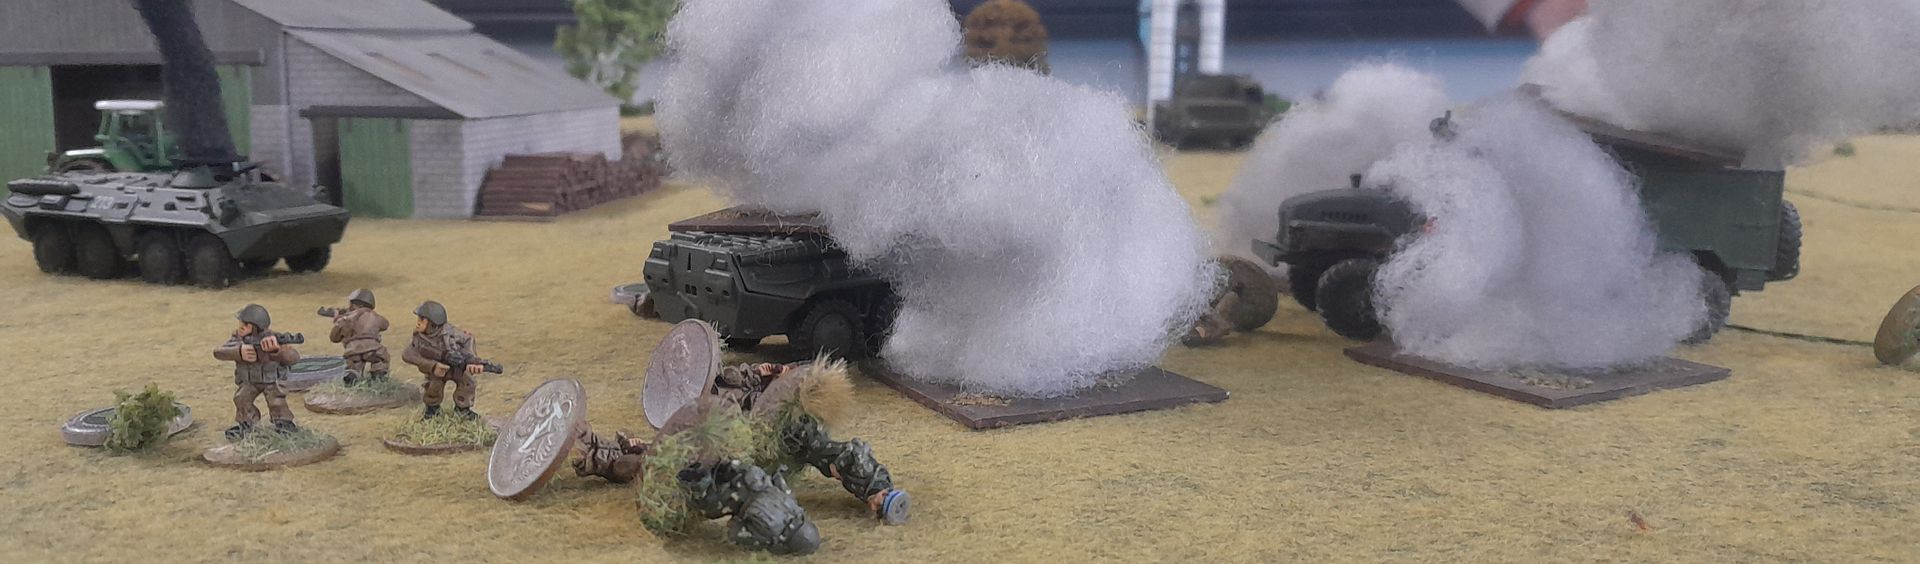
Some Soviets started to close in on the Marines, who had maintained a steady stream of fire up until this point.  Here NATO forces suffered their first casualty.  "Lobster" took a round from somewhere and went down in a heap.  It was time to relocate, so a couple of smoke grenades got lobbed directly in front of their position and "Florry" checked out "Lobster".  He was dead.  Must have been a round from the QRF BTR's 14.5mm heavy machinegun.  A quick morale check showed that no-one on the team had really liked "Lobster" all that much, so they were happy to carry on and leave his body to the Soviets!  Along with the demo charges set on the Smart TEL that is.
What had been a little bit of a British (and Sven) Turkey Shoot for a while there (although they did get a bit stressed from time to time), had now taken a rather negative turn in the Soviet's favour.  It was time to get serious.
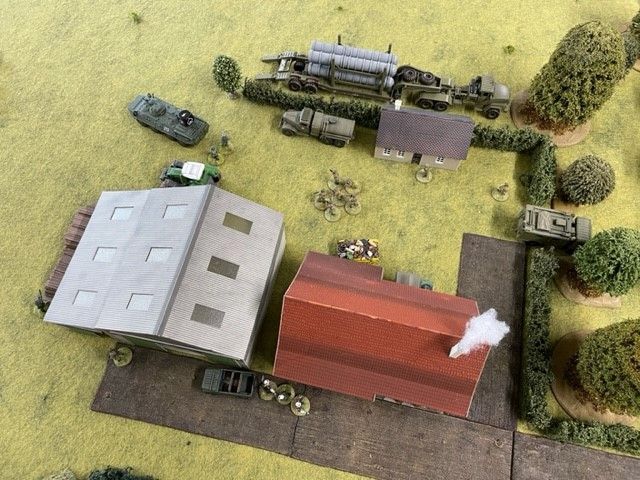
You can see the 2 smoke grenades have gone off just in front of the Marine's position near the smart TEL.  Soviet troops heading off in a flanking manoeuvre are in the foreground. 

And they were now serious, the Special Forces first put a LAW into their primary target - the radar vehicle.  The rocket hit the compartment that housed the crew stations and all the really quite important electronics.  They followed that up by catastrophically destroying the Air Defence Command Post, taking out a couple of the soldiers hiding behind it.


Somehow by this point they also managed to knockout the original BTR-70 they had damaged earlier in the action
You can see it burning centre stage.
And here they have also knocked out a second BTR-70.  So much for the Soviet comeback.

Hang on - what was I saying????

Best random event ever - 2 Mi-24 Hind-D helicopters turn up.  As a random event the helo's were just meant to over-fly the SAM site on their way to somewhere else way more important.  It was meant to be a distraction, so all the guards would look up at them, while the Special Forces snuck about a wee bit more actively for one turn.  However, this had the helo's turn up during the more kinetic part of the mission - in time to see lots of Soviet kit leaping into the air - so I thought it best to give the pilots the opportunity to become involved.

They ended up making 2 passes before the game ended.  On their first attempt neither Hind managed to spot the Special Forces, much to their relief.  They were already on their way off the board and decided that shooting at the helo's would just annoy them more, so why bother.  Keep running and press the remote detonators!

As the two dumb TELs go up, one of the Hinds manages to get a bead on the SAS Team, who are right on the table edge.  A burst of fire and "Boss" goes down.  A quick check and alas he too is dead.  Two casualties in the whole mission and both of them dead.

The NATO forces withdraw from the battlefield.  It will be difficult for them to get back to their helicopter with a couple of Hinds hunting them - but that's another story for another day.

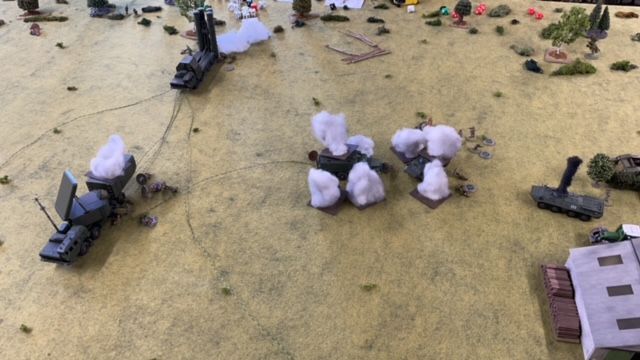
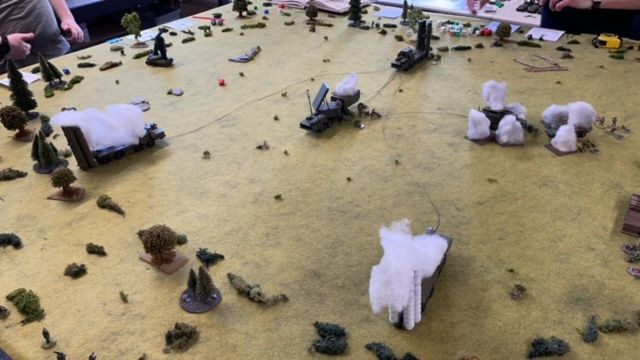
Here's a look at the battlefield from above at the end of the game


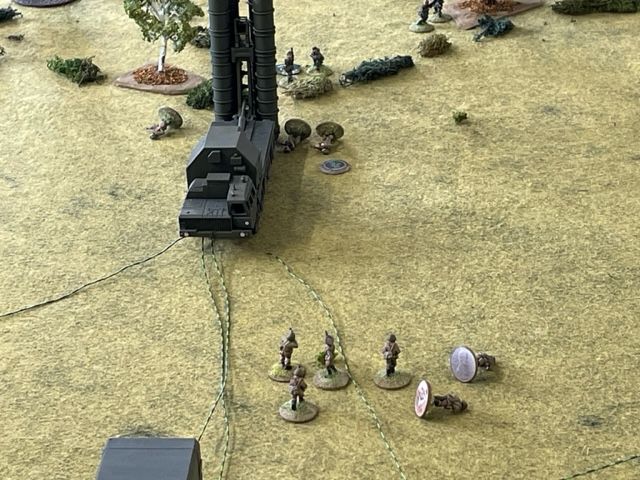
And from the sniper team's point-of-view

Although the Smart TEL looks intact, it does have a timed charge on it set to go off just as the air raid comes in.

By my calculations NATO gets 55 victory points and the Soviets get about 32 vps.  So that's a pretty clear victory to NATO.

Interestingly we played the exact same mission at NATCON and although at one point I was thinking NATO has this in the bag, by the end of the game I had captured/killed every one of the Special Forces bar 2 Royal Marines who escaped.  The Soviets got no helo assistance, but managed to overwhelm the spread out Brits one unit at a time.  Each time a Spec Ops trooper went down no-one could get to him to do a First Aid Check, so their firepower just kept getting lower and lower.  When there is a lot of fire coming at you, even if you are using a D12, one bad roll and its all over. 

So that's it for my trip down memory lane playing Force on Force.

I actually have a game of BG: Cold War coming up soon, so I'll be doing another AAR for that when the time comes.  And more besides I hope in between.

Chat to you all soon

Richard